Blog

  • Master Your Camera Modes: A Simple Guide to Auto, Aperture, Shutter & Manual Settings

    Master Your Camera Modes: A Simple Guide to Auto, Aperture, Shutter & Manual Settings

    Tired of your camera deciding everything for you? Let’s unlock its full potential today!

    Here is the answery bit

    Ever wonder why your camera sometimes nails the shot in Auto, yet other times your brilliant photographic idea falls flat? It’s all about how  much control you have, and how much you let the camera decide. Your camera’s shooting modes are your direct gateway to greater creative expression. They bridge the gap between simply snapping a picture and intentionally crafting an image that reflects your vision.

    Moving beyond Auto, whatever it is called, allows you to tell the camera what’s genuinely important to you – whether that’s freezing action, blurring a background, or taking complete, meticulous command of the light. Each mode offers a distinct balance of automation and your input, designed to help you achieve specific photographic results without getting bogged down in every single setting.

    Auto modes are convenient and great for beginners, and for folk who can’t be bothered to use other modes. And if that is you and you are happy with this then that is of course fine. But, for specific creative or precise technical results, you must explore other modes. Auto decides everything, often sacrificing your creative vision for a “safe” exposure. This can lead to unpredictable results and limits your ability to do stuff like intentionally blur backgrounds, emphasise fine details, create motion blur, take long exposures, and of course let’s not forget to manage tricky lighting. Sticking to Auto also stops you from truly understanding how light, aperture, shutter speed, and ISO interact. More aperture and shutter speed for me, but I will come onto that lot later.

    Understanding these modes means you can stop guessing and start creating with purpose, which will result in you creating better photos.

    Other than full auto, program, manual, aperture priority and shutter priority modes there are lots of scene specific modes. I am not talking about those here. I am talking about the scene specific ones, like landscape, portrait, HDR, backlit night portrait, rabbit in the headlights in a snow storm, that kind of thing. All sorts of scene specific stuff. I am not talking about those for one reason and one reason only. I have not used any of them in decades. If ever. Blimey that was a tad dramatic!

    Hello and welcome to the Photography Explained Podcast! And a very good morning, good afternoon, or good evening to you, wherever you are in the world. I’m your host, Rick, and in each episode, I try to explain one photographic thing in plain English in less than 27 minutes (ish), without the irrelevant details. I’m a professionally qualified photographer based in England with a lifetime of photographic experience, which I share with you in my podcast.

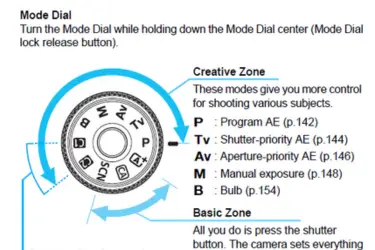
    Today, we’re diving into the heart of your camera’s control – its shooting modes. That dial on top of your camera with letters like M, Av, Tv, P, and that green square? And lots of symbols. We’ll break down exactly what each mode means, when to use it, and how understanding them gives you immense creative power over your photos. This isn’t about complex theory; it’s about practical use to get the shots you want, every time.

    How utterly splendid. Let’s get into this.

    Here are 5 top tips for Understanding and Using Your Camera Modes!

    OK. Time for some detailed photography tips to help us consistently choose the right mode for the right photo. These strategies will simplify your camera dial and help you achieve professional results.

    1: Auto Mode: The Green Square Explained (Your Camera’s Basic Brain)

    First up, let’s talk about Auto Mode. This is usually marked with a green square or simply “Auto” on your camera’s dial. Here, your camera makes every single decision for you: aperture, shutter speed, ISO, flash, even white balance. It’s designed to give you a “correctly exposed” image without your input.

    When to use it:

    • Quick snapshots: When you just need to capture a moment without thinking. Like when your dog does something unexpectedly cute.
    • Handing off your camera: If you give your camera to a non-photographer to take your picture, Auto mode is their friend.
    • Unexpected moments: When a scene unfolds quickly, and there’s no time to fuss with settings.
    • If you are an absolute beginner.
    • Or if you just can’t be bothered using anything else!

    The downside: You have no creative control. The camera aims for a technically correct exposure, but it might not be the best for your artistic intent. For instance, it might use high ISO in good light, giving you unwanted noise, or a wide aperture that blurs out too much. Think of Auto as training wheels. Great for getting started, but you’ll soon outgrow them.

    Right – next.

    2: Program Mode (P): The Intelligent Auto (Your Camera’s Smart Assistant)

    Our next mode is Program Mode, often marked with a “P” on your dial. No that is not P for professional! This is like an “intelligent auto,” a very useful stepping stone. Your camera still chooses both aperture and shutter speed for correct exposure, but it gives you control over other important settings like ISO, flash, and white balance. Crucially, in Program mode, you can often “shift” the program – meaning you can rotate a dial to choose different combinations of aperture and shutter speed that still result in the same exposure.

    When to use it:

    • Faster workflow: When you need a quick, reliable exposure but want to manage things like ISO to control noise, or to force the flash on or off.
    • Learning exposure combinations: It’s a great way to see how aperture and shutter speed relate – as you change one, the camera automatically changes the other to maintain exposure.
    • General shooting: A fantastic default for everyday photography when you want more control than Auto but less manual intervention.

    Program mode is a significant step up, offering plenty of flexibility without requiring you to set everything yourself.

    Tip 3: Aperture Priority Mode (A or Av): Master Your Depth of Field (Control the Blur!)

    Host: Now we’re truly getting into the creative modes! Aperture Priority, often labelled “A” (for Aperture) or “Av” (for Aperture value) on Canon cameras, is where you choose the aperture, and your camera automatically selects the appropriate shutter speed for a correct exposure. You still control ISO.

    Why Aperture? Aperture controls two main things:

    1. Depth of field: Or depth of sharpness as I like to call it. This is the range of distances in your image that appears acceptably sharp. A wide aperture (a small f-number like f/1.8 or f/2.8) gives you a shallow depth of field. This blurs the background beautifully (bokeh), isolating your subject – perfect for portraits. A narrow aperture (a large f-number like f/8 or f/16) gives you a deep depth of field, keeping much more of the scene sharp from front to back, ideal for landscapes or group photos.
    2. Light: A wider aperture lets in more light, which is incredibly useful in dim conditions where you don’t want to increase your ISO too much.

    When to use it:

    • Portraits: To blur backgrounds and make your subject pop.
    • Landscapes: To ensure everything from a foreground flower to a distant mountain is sharp.
    • Low light: To open up the lens and gather as much light as possible.
    • Architectural photography. Like what I do.

    This is a fantastic mode for creative control over focus and background blur.

    Tip 4: Shutter Priority Mode (S or Tv): Control Your Motion (Freeze or Blur!)

    Our fourth mode is Shutter Priority, usually marked “S” (for Shutter) or “Tv” (for Time value) on Canon cameras. In this mode, you choose the shutter speed, and your camera automatically selects the appropriate aperture for a correct exposure. You still control ISO.

    Why Shutter Speed? Shutter speed primarily controls one thing: motion.

    • Fast shutter speed (e.g., 1/500s or 1/1000s): This will freeze action. Think sports, kids running, or birds in flight. It’s also great for ensuring sharp handheld shots when worried about camera shake.
    • Slow shutter speed (e.g., 1/30s, 1s, or even longer): This will blur motion. You can use it creatively to get silky smooth waterfalls, dramatic light trails from car headlights at night, or to convey movement in an action shot.

    When to use it:

    • Sports/Action: To perfectly freeze fast-moving subjects.
    • Waterfalls/Rivers: To create that smooth, ethereal, misty look for moving water.
    • Night photography (light trails): To capture the streaks of car lights or the movement of stars.
    • Handheld in tricky light: To ensure a fast enough shutter speed to avoid your own camera shake, even if it means sacrificing some depth of field.

    Shutter Priority is your go-to mode when controlling motion is your absolute main priority.

    Tip 5: Manual Mode (M): The Ultimate Control Panel (Take Full Command)

    Finally, we arrive at Manual Mode, marked with an “M”. This is where you take complete control over your exposure. You set the aperture, the shutter speed, and the ISO. Your camera’s built-in light meter will still give you a reading (usually a little scale in your viewfinder or on your screen) to help you achieve a correct exposure, but it won’t change anything automatically. And if your camera settings are way out the photo you get will be way out too. It is really all down to you.

    When to use it:

    • Consistent lighting: In a studio setting with controlled lights, or when ambient light isn’t changing. Once set, you can shoot repeatedly with the same exposure.
    • Complex lighting: When the camera’s automatic meter might be fooled. For example, shooting a bright white subject on snow, or a very dark subject, where the camera might try to make it middle grey. You override the camera’s ‘guess’.
    • Specific creative effects: When you need very precise control over both your depth of field and your motion blur simultaneously, such as for advanced long exposure photography or when intentionally over-exposing or under-exposing for artistic reasons.
    • Learning: This is the most powerful learning tool. It forces you to truly understand the relationship between aperture, shutter speed, and ISO, invaluable for mastering photography. It might feel intimidating at first, but practicing in Manual mode is the fastest way to understand how all your settings work together.
    • When you want to. Simple. If you want to use manual mode, go for it.

    So, there you have it – a clear breakdown of your camera’s main shooting modes. Remember, there’s no single “best” mode; it’s about choosing the right tool for the job. Start with what’s comfortable, experiment with each one, and gradually take more control as your confidence grows. The more you understand these modes, the more command you’ll have over the final look of your images. Practice, practice, practice!

    Note – other camera systems

    Other camera manufacturers have similar modes with different names. But all of the above applies with any make of camera.

    Here is something for you to do.

    Learn manual mode. Yes really. Learn manual mode and tell me how you get on. Why should you do this? Because if you are serious about your photography there will be a time when you will need it. And if you do learn how to use manual mode and find yourself needing it don’t forget to thank me!

    What if I use a phone to take my photos?

    Great question Rick. Well all I do with my phone camera is use the default picture taking mode. I have never tried to find anything else. I have a camera for that after all.

    So tell me dear listener – am I missing out here?

    What do I do?

    I am a professional architectural and real estate photographer. And I take all my photos with my camera on a tripod. Image quality, sharpness and the right depth of field (sorry depth of sharpness), so I use Av Mode, or aperture priority mode. I don’t really care what the shutter speed is, as what I am photographing is not moving. And I use the lowest ISO, which is 100. This is the ISO that my camera was designed to be used with. Change the ISO and you are digitally amplifying the signal. I would rather not do that.

    I use P when I can’t be bothered doing anything else, which is when I am wandering around aimlessly and can’t be bothered thinking about camera settings. This is never on a commercial shoot mind. It is when I have free time to play, or I am on holiday.

    It could be called can’t be bothered mode!

    And I use Shutter priority when I need to, which is not often.

    And I use manual mode when I need to or want to.

    My approach boils down to meticulous control of everything:

    • AV Mode all the way: I set my aperture for maximum sharpness (the lens’s sweet spot, often f/8), my ISO to the lowest possible (ISO 100 on my Canon 6D for maximum quality), and then the shutter speed is what it is. And yes it is that simple. This gives me ultra-consistent results.
    • Precision focusing: I manually select my focus point for every shot, ensuring critical sharpness on the most important elements of a scene. I use back-button focus, which separates focus from exposure and taking the photo.
    • Vibration elimination: I always use the built-in self-timer (2 or 10-second delay) to avoid any subtle vibrations caused by touching the camera.
    • Lens choices: I pick the right lens for the job, understanding its characteristics, and always use a lens hood to maintain contrast and clarity.

    This isn’t just theory; it’s the practical application of taking full control of my gear to ensure every image I deliver is crystal clear, professional, and reflects my precise vision.

    Final Takeaways and Summary for Mastering Your Camera Modes

    Understanding your camera’s modes is crucial for creative control. Each mode offers a different level of automation and flexibility:

    • Auto: For quick, simple snapshots.
    • Program (P): More control than Auto, with the ability to shift aperture/shutter combinations.
    • Aperture Priority (A/Av): Control image quality and depth of field.
    • Shutter Priority (S/Tv): Control motion (freeze or blur).
    • Manual (M): Full control over all exposure settings.

    Experiment with each mode. Practice makes perfect, transforming your photography technique to deliver professional results and capture your vision every time.

    Host: Find show notes, links, and a summary at [Your Website Address Here] (search Episode 211).

    • SEO Keywords for this Episode’s Blog Post: Camera Modes Explained, Photography Camera Settings, Auto Mode, Aperture Priority Mode, Shutter Priority Mode, Manual Mode, DSLR Modes, Mirrorless Camera Modes, Camera Dial Explained, Photography Basics, Learn Camera Settings, Beginner Photography Modes, Creative Camera Control, Depth of Field Control, Motion Blur Control, Exposure Control, Camera Settings Guide, Photography Tips, How To Use Camera Modes.

    Some thoughts from the last episode

    All I wanna say about the last episode, your aim with every photo is to get the sharpest photo you can, and that will make your photos stand out from everybody else other than professional photographers.

    Next Episode

    Next week: Episode 212: Creative Use of Depth of Field: Blurry Backgrounds, Sharp Subjects. We’ll dive deeper into using aperture to control what’s sharp and what’s gloriously blurred in your photos. Subscribe so you don’t miss it!

    Get an email from me.

    Want a weekly email from me? Fill in the box on any of my websites. Every Friday, you’ll read my photography thoughts.

    Ask me a question

    Have a question or want to say hi? Email sales@rickmcevoyphotography.co.uk, visit the podcast website, or text me from the podcast feed. It’s always lovely to hear from you, my dear listeners.

    Subscribe and Never Miss an Episode!

    Enjoying the podcast? Subscribe now on Apple Podcasts, Spotify, or wherever you listen. It ensures you get every new episode and helps us reach more photographers! Don’t delay, subscribe today!

    This episode was brought to you by a cheese and pickle sandwich and a popular carbonated soft drink with zero sugar in it, which I consumed it before settling in my homemade, acoustically cushioned recording emporium.

    I’ve been Rick McEvoy. Thanks again for listening to my small but perfectly formed podcast and for giving me 27 minutes of your valuable time. I reckon this episode will be about 25 minutes long after editing out the mistakes and bad stuff.

    Thanks for listening

    Take care and stay safe.

    Cheers from me, Rick

    Want to know more?

    Head over to the Start page on the Photography Explained Podcast website to find out more.

    And here is the list of episodes published to date – you can listen to any episode straight from this page which is nice.

    Let me know if there is a photography thing that you want me to explain and I will add it to my list. Just head over to the This is my list of things to explain page of this website to see what is on there already.

    Let me send you stuff

    I send out a weekly email to my subscribers. It is my take on one photography thing, plus what I have been writing and talking about. Just fill in the box and you can get my weekly photographic musings straight to your inbox. Which is nice.

    And finally a little bit about me

    Finally, yes this paragraph is all about me – check out my Rick McEvoy Photography website to find out more about me and my architectural, construction, real estate and travel photography work. I also write about general photography stuff, all in plain English without the irrelevant detail.

    Thank you

    Thanks for listening to my podcast (if you did) and reading this blog post (which I assume you have done as you are reading this).

    Cheers from me Rick

    Rick McEvoy Photography
  • How to Get Sharp Photos Every Time: Beyond Just Focusing!

    How to Get Sharp Photos Every Time: Beyond Just Focusing!

    Tired of blurry photos? Let me tell you how to get crisp, clear, sharp photos every time.

    Here is the answery bit

    Achieving pin-sharp images goes beyond just nailing focus. A truly sharp photo is a balanced equation, involving elements you might not realize affect your final image. Your camera’s autofocus system excels at where to focus, but it can’t stop camera shake (tiny camera movement during exposure) or motion blur (subject movement). These are major culprits of soft images, especially in lower light.

    Your lens also plays a huge role. Every lens has a ‘sweet spot’ – an aperture (often f/5.6 to f/11) where they’re sharpest. Shooting wider or narrower can reduce sharpness. Additionally, digital noise from high ISO settings obscures fine details, making images less sharp.

    We need to understand our gear and image capture techniques to get the ultimate sharpness. It’s about optimising shutter speed to freeze motion, choosing the correct aperture for clarity, keeping your camera stable with a proper grip or a tripod, and leveraging post-processing sharpening. This holistic approach transforms snapshots into crystal-clear images.

    Hi, and a very warm welcome to Episode 210 of the Photography Explained podcast. I’m your host, Rick, and in each episode, I explain one photographic thing in plain English in less than 27 minutes (ish), without irrelevant details.

    I’m a professionally qualified photographer based in England with a lifetime of photographic experience, which I share with you in my podcast.

    You can listen to the episode here

    Or keep on reading – entirely up to you!

    Understanding Sharpness: The Core Principle for Crystal-Clear Photos

    Sharpness defines an image’s clarity and distinctness of detail—well-defined elements, textures, and edges appearing crisp and precise. While focus determines which part is clear, sharpness describes how clear it truly is.

    Consistently capturing pin-sharp images goes beyond just relying on autofocus. Many photographers struggle with seemingly in-focus images that still lack crispness, often due to subtle camera shake, motion blur, or incorrect camera settings. We need to think about camera stability, appropriate shutter speeds, lens choice, proper aperture selection, and careful post-processing.

    You need to properly understand how your camera works. You must minimise any movement during exposure, whether from your hands (camera shake) or the subject (motion blur). This episode is your comprehensive guide to unlocking incredible detail and clarity, ensuring your photos look professional and crystal clear every time you press the shutter.

    How utterly splendid. Let’s get into this.

    Understanding Sharpness: More Than Just Focus

    Sharp photos require more than just focus. Even with accurate autofocus, other factors reduce clarity:

    • Camera Shake: Any camera movement during exposure.
    • Motion Blur: Movement of your subject during exposure.
    • Lens Quality: Varies between lenses.
    • Atmospheric Conditions: Haze, heat haze, or air quality affecting clarity, especially over distances.
    • Digital Noise: High ISO settings introduce noise, reducing perceived sharpness.

    Here are 5 top tips for Getting Sharp Photos Every Time!

    OK. Time for some detailed photography tips to help us to consistently capture pin-sharp images, moving beyond just focus. These strategies cover gear, technique, and post-processing, helping you achieve professional results.

    Tip 1: Shutter Speed for Sharp Photos: Freeze Motion & Eliminate Blur (and the Power of a Tripod!)

    Shutter speed refers to the time your camera’s shutter remains open, allowing light to hit the sensor. As a photographer who relies heavily on tripods, I can attest to their significant benefits in maximising sharpness by eliminating virtually all camera movement during exposure.

    • Freezing Motion:
      • For still subjects, especially when using a tripod, you can confidently use slow shutter speeds (e.g., 1/30th sec, or even seconds for long exposures) without introducing motion blur from the subject.
      • For handheld shots, use the reciprocal rule, “1/focal length” rule (e.g., 50mm lens: 1/50th sec or faster).
      • For fast-moving subjects (sports, cars), use faster shutter speeds: 1/500th sec or 1/1000th sec+.
    • Camera Shake Minimisation:
      • A sturdy tripod is the ultimate solution for camera shake, allowing for extremely long exposures and maximising detail in static scenes like landscapes or architecture. For my architectural work, I use a tripod to help me get verticals and horizontals bang on lines and the sharpest photos I can.
      • If a tripod isn’t possible, activate lens image stabilisation (IS) or the camera’s in-body image stabilisation (IBIS) if you have them. My Canon 6D doesn’t. Neither does my 17-40mm lens. Tripod it is, then, Rick!
      • Use a remote shutter release, two-second timer, or Wi-Fi app to eliminate vibrations from physically pressing the shutter button.

    Mastering shutter speed and embracing the stability of a tripod are fundamental to achieving sharp photos and eliminating unwanted blur.

    Tip 2: Aperture for Maximum Photo Sharpness & Depth of Field

    While shutter speed battles motion, aperture controls depth of field and impacts overall perceived sharpness.

    • Depth of Field: The range of distances appearing acceptably sharp. Or depth of sharpness, as I like to call it. Where does the field come into this anyway???
      • A wide aperture (small f-number like f/1.8) creates a shallow depth of field, isolating subjects with blurred backgrounds (bokeh). This requires precise focusing.
      • A narrow aperture (large f-number like f/16) creates a large depth of field, keeping more of the scene sharp (common in landscape photography).
    • Lens Sweet Spot: Every lens has an “optical sweet spot”—an aperture where it’s sharpest, usually 2-3 stops narrower than its widest. Extreme apertures can introduce slight softness due to aberrations or diffraction.
    • Diffraction: At very narrow apertures (e.g., f/16), light bending around aperture blades causes slight image softening. Avoid the narrowest apertures for maximum sharpness.

    Understanding the aperture’s influence on depth of field and image clarity is vital for consistently sharp photos. Get to know your lenses, where the sweet spot is, and what errors you get at maximum and minimum apertures.

    Tip 3: ISO Settings: Avoid Noise for Crystal-Clear Sharpness

    ISO controls camera sensitivity. Higher ISOs allow shooting in darker conditions, but introduce digital noise.

    • Noise vs. Sharpness: Digital noise (random speckles/graininess) obscures fine details, making photos less sharp.
    • Golden Rule: Use the lowest ISO setting possible for the given light. This minimises noise and preserves detail. I take photos with my camera on a tripod, meaning I can use ISO100, which is the ISO my Canon 6D was designed to take photos with.
    • However, if a faster shutter speed is needed for sharp photos of moving subjects, and the aperture can’t be wider, increasing ISO might be necessary. It’s a balance – noise is preferable to motion blur or camera shake.
    • You can do something with noise in post-processing, but you can’t fix a blurry photo. Noise Reduction in Post-Processing: Photo editing software offers noise reduction tools. Use subtly; aggressive reduction can soften details.

    Keeping the ISO down is crucial for preserving inherent sharpness and achieving crystal clear images.

    Tip 4: Lens & Technique: Mastering Camera Stability for Sharp Images

    Your lens is equally, if not more, important than your camera body when it comes to sharpness. Combined with solid shooting technique, it forms the absolute foundation for clear images.

    • Lens Selection & Quality Factors:
      • Prime Lenses: Prime lenses (fixed focal length) are generally optically sharper than zoom lenses because they’re designed for a single optimal performance point.
      • Quality Zooms: High-quality zoom lenses (often more expensive, with constant maximum apertures like f/2.8) can still deliver excellent sharpness across their zoom range.
      • Avoiding Cheap Filters: Low-quality UV or other inexpensive filters can significantly degrade sharpness by introducing reflections, glare, or chromatic aberration. Always invest in high-quality optical glass filters if you must use them. The best that you can afford. Look after them and they will serve you for many years.
      • Lens Hoods: Use a lens hood to block stray light from entering the lens. This prevents lens flare, which washes out contrast and makes images appear less sharp, even if perfectly focused.
      • Lens Cleanliness: Dust, smudges, or fingerprints on your front or rear lens elements will dramatically reduce sharpness. Regularly clean your lenses with a microfibre cloth and proper lens cleaning solution.
    • Focusing Accuracy:
      • Autofocus Modes: Understand and use your camera’s various autofocus modes (e.g., Single-Shot AF for static subjects, Continuous AF for moving subjects) to ensure precise focus acquisition.
      • Focus Points & Recomposing: Don’t just rely on the central focus point. Actively select specific focus points that fall directly on your subject’s most important feature (e.g., the eyes in a portrait). If you focus and then recompose, you risk slight focus shift, especially with shallow depth of field. Consider Back Button Focus for greater control.
      • Manual Focus: For very precise work, particularly in low light or with challenging subjects (like architectural details), manual focus (using focus peaking or magnification in your viewfinder/LCD) can be more accurate than autofocus. In theory. Although I rarely use this. I am quite old. My eyes are quite old. My camera might be old too, but not as old as me, ha! And it focuses better than I can. But manual focus is always there for you, dear listener.
    • Camera Stability & Vibrations:
      • Proper Handholding: If handholding, use a stable stance, tuck your elbows in tightly against your body, and breathe out slowly as you press the shutter. Bracing yourself against a wall or tree can also provide extra stability.
      • Mirror Lock-Up/Electronic Shutter: For DSLRs, activating mirror lock-up minimizes vibrations caused by the mirror flipping up. For mirrorless cameras, this is not a problem. Of course.

    Investing in quality lenses and mastering proper shooting techniques are vital steps to getting sharp photos every time.

    Tip 5: Post-Processing Sharpening: The Final Touch for Pro Photo Clarity

    Even with perfect in-camera techniques, digital photos benefit from sharpening in post-processing to bring out details.

    • Why Sharpening? Digital camera sensors, by their nature, apply a slight softening to prevent aliasing. The raw capture process benefits from a gentle sharpening to bring out the best.
    • Shoot in RAW: RAW files contain maximum data for effective, non-destructive sharpening. JPEGs have in-camera sharpening applied, limiting your flexibility.
    • Targeted Sharpening: Don’t just apply global sharpening to the entire image. Use local adjustment tools (brushes, masks) in your photo editing software to selectively sharpen only the areas that need it most, such as the subject’s eyes or textured details. Avoid sharpening smooth areas like skin or skies, as this can introduce unwanted noise. And can be unflattering.
    • Output Sharpening: Most photo editing software allows you to apply different levels of sharpening depending on your output (e.g., for web, for print). Sharpening for web display is often more aggressive than for large prints.
    • Avoid Over-Sharpening: Too much sharpening can introduce halos around edges, make details look artificial, and exaggerate digital noise. Less is often more. Apply sharpening judiciously and always zoom in to 100% to assess the effect.

    Post-processing sharpening is the crucial final touch that can elevate a well-captured image to a truly pin-sharp image.

    What if I use a Phone to Take Photos?

    Smartphone cameras can also capture sharp photos with smart approaches:

    • Good Light: More light means lower ISO, less digital noise, and sharper images.
    • Steady Hands: Hold with both hands, tuck elbows, or lean against something to prevent motion blur.
    • Volume Button: Use the volume button to take photos, which will help reduce shake from screen tapping.
    • “Tap to Focus”: Tap your subject to ensure precise autofocus.
    • Lens Cleaning: Wipe your phone’s lens regularly; smudges cause soft, hazy photos.
    • In-App Sharpening: Use sharpening sliders subtly in editing apps.

    These tips significantly elevate your mobile phone photography results.

    What do I do?

    As a professional architectural and real estate photographer, pin-sharp images aren’t just a preference – they’re a fundamental requirement for me. My work, which you can see at rickmcevoyphotography.com, requires the sharpest photos every time. So, how do I achieve this consistent sharpness in every single shot I deliver?

    My approach boils down to a meticulous application of the core principles we’ve discussed, refined over a lifetime of practical experience:

    • My tripod. My tripod is my constant companion, eliminating every trace of camera shake, allowing me to use the optimal aperture for every photo to get the cleanest, sharpest image every time, with the depth of field I want. And no distortion or lens errors.
    • Back button focus. I have assigned a button on my Canon 6D to allow me to focus and then take the photo. Exposure and focus are separated, giving me greater control.
    • The right Shutter Speed: I always select a shutter speed that guarantees stillness. Whether I’m managing subtle indoor movements or battling wind outdoors, my priority is ensuring the subject and camera remain perfectly still during the exposure.
    • Lens hood. Yes, my good old, underrated lens hood. I always use a lens hood for every photo that I take. It stops lens flare and unwanted light from spoiling my photos, and also protects my precious front lens element from damage. The best free camera accessory you can get.
    • ISO Management: I use the lowest ISO setting possible, 100 on my Canon 6D. This minimises digital noise, which is critical for preserving the fine details, textures, and clean lines essential for high-quality property photography.
    • Precision Focusing & Technique: I choose the focus point manually for every photo I take. I always use the built-in self-timer to avoid any subtle vibrations from touching the camera.
    • Post-Processing: Finally, precise post-processing sharpening is applied to my RAW files. This final step enhances the detail without introducing artefacts or over-sharpening, ensuring the image maintains its natural clarity and sharpness.

    This isn’t just theory; it’s the practical application of principles I’ve refined through countless shoots, ensuring that every image I deliver is crystal clear, professional, and showcases the property’s best features.

    Check out Photography Explained Podcast Episode 177 – Photography Tips – How To Actually Take A Photo for more on, erm, how to take a photo.

    Final Takeaways and Summary for Achieving Pin-Sharp Photos

    Eliminate anything compromising image clarity: camera shake, motion blur, digital noise. Apply these techniques—choosing aperture, focusing precisely, using image stabilisation, and refining in post-processing—for crystal clear images.

    • SEO Keywords for this Episode’s Blog Post: Sharp Photos, Get Sharp Photos, Beyond Focusing, Camera Sharpness, Pin-Sharp Images, Image Clarity, Photography Sharpness Tips, Shutter Speed, Aperture, ISO, Camera Shake, Motion Blur, Digital Noise, Correct Focus, Autofocus, Manual Focus, Tripod, Image Stabilization, Lens Quality, Prime Lens, Depth of Field, Post-Processing Sharpening, RAW Files, Photo Editing Software, Well-Exposed Photos, Professional Results, Crystal Clear Images, Photography Techniques, Focus Acquisition, Lens Sweet Spot, Diffraction, Electronic Shutter, Mirror Lock-Up, Exposure Triangle, Mobile Phone Photography Sharpness.

    Next Episode

    Next week: Episode 211: Camera Modes: When to Use Aperture Priority, Shutter Priority, and Manual. That kind of thing. Subscribe so you don’t miss it!

    Get an email from me.

    Want a weekly email from me? Fill in the box on any of my websites. Every Friday, you’ll read my photography thoughts.

    Ask me a question

    Have a question or want to say hi? Email sales@rickmcevoyphotography.co.uk, visit the podcast website, or text me from the podcast feed. It’s always lovely to hear from you, my dear listeners.

    Subscribe and Never Miss an Episode!

    Enjoying the podcast? Subscribe now on Apple Podcasts, Spotify, or wherever you listen. It ensures you get every new episode and helps us reach more photographers! Don’t delay, subscribe today!

    This episode was brought to you by a cheese and pickle sandwich and a bag of salt and vinegar crisps. I consumed it before settling in my homemade, acoustically cushioned recording emporium.

    I’ve been Rick McEvoy. Thanks again for listening to my small but perfectly formed podcast and for giving me 27 minutes of your valuable time. I reckon this episode will be about 20-22 minutes long after editing out the mistakes and bad stuff.

    Thanks for listening

    Take care and stay safe. Cheers from me, Rick

    Want to know more?

    Head over to the Start page on the Photography Explained Podcast website to find out more.

    And here is the list of episodes published to date – you can listen to any episode straight from this page which is nice.

    Let me know if there is a photography thing that you want me to explain and I will add it to my list. Just head over to the This is my list of things to explain page of this website to see what is on there already.

    Let me send you stuff

    I send out a weekly email to my subscribers. It is my take on one photography thing, plus what I have been writing and talking about. Just fill in the box and you can get my weekly photographic musings straight to your inbox. Which is nice.

    And finally a little bit about me

    Finally, yes this paragraph is all about me – check out my Rick McEvoy Photography website to find out more about me and my architectural, construction, real estate and travel photography work. I also write about general photography stuff, all in plain English without the irrelevant detail.

    Thank you

    Thanks for listening to my podcast (if you did) and reading this blog post (which I assume you have done as you are reading this).

    Cheers from me Rick
    Rick McEvoy Photography
  • Taking Great Photos in Direct Sunlight: 5 Tips for Beating the Harsh Light

    Taking Great Photos in Direct Sunlight: 5 Tips for Beating the Harsh Light

    Ever squint at your photos from a sunny day? Today, we’re fixing that! Discover how to capture stunning photos in direct sunlight, mastering the light, not fighting it.

    Today, we’re tackling one of photography’s most common challenges: taking great photos in direct sunlight. Many photographers feel stuck, battling harsh shadows and blown-out highlights that turn vibrant scenes into high-contrast headaches. The immediate answer, and your key to unlocking incredible sunny day photography, is this: direct sunlight isn’t always your enemy; it’s a powerful light source that, when understood and creatively managed, can produce stunning, dramatic, and impactful images.

    How utterly splendid. Let’s get into this.

    Good morning, good afternoon, or indeed, good evening, wherever you are in the world! Welcome back to Episode 209 of the Photography Explained podcast. I’m your host, Rick, and in each episode, I will try to explain one photographic thing to you in plain English in less than 27 minutes (ish) without the irrelevant details. Yes, really.

    You can listen to the episode right here

    I’m a professionally qualified photographer based in England with a lifetime of photographic experience, which I share with you in my splendid podcast.

    I know I said I was doing crop factor, but I changed my mind. Sort of continuing the theme from the last episode. Well why not eh?

    Let’s get straight into this.

    The secret lies in adapting your approach. Instead of wishing for cloudy days, learn to master the sun’s intensity. This means embracing techniques like strategically placing your subject in open shade for beautiful, diffused light, or cleverly using the sun as a backlight to create gorgeous rim light and captivating silhouettes. We’ll delve into essential camera settings like using exposure compensation to balance highlights and shadows, and how simple accessories like a reflector or diffuser can transform challenging light. We’ll also explore why shooting in RAW is non-negotiable for harsh light conditions and how post-processing can help you recover vital detail. This episode will equip you with practical photography tips to confidently shoot in bright conditions, turning those frustrating, squint-inducing scenes into beautifully well-exposed photos. Get ready to see the sun as an opportunity, not a limitation, and capture stunning images every time.

    Understanding the Problem: Why Direct Sunlight is Tricky for Photos

    When the sun is high and bright, it creates very hard light. This isn’t inherently bad, but it presents specific challenges for your camera and your subject:

    • High Contrast: The most significant issue. Direct sunlight creates incredibly bright highlights and very dark, defined shadows. Your camera’s dynamic range often struggles to capture detail in both extremes, leading to either blown-out highlights (pure white, no detail) or crushed shadows (pure black, no detail).
    • Squinting Subjects: People naturally squint or frown in bright sun, which isn’t flattering for portraits.
    • Harsh Shadows on Faces: Direct overhead sun can cast unflattering shadows under eyes and noses, creating a ‘raccoon eyes’ effect.
    • Unwanted Glare and Reflections: Shiny surfaces, water, and even leaves can reflect direct light right back at your lens, causing lens flare and reducing contrast.

    Understanding these challenges is the first step to overcoming harsh light and taking well-exposed photos even on the sunniest days.

    What Do I Do? Immediate Actions for Beating Harsh Light

    Facing bright sun? Don’t just point and shoot. Here are three immediate actions you can take to improve your photos in direct sunlight dramatically:

    1. Seek Open Shade: This is your easiest win. Move your subject under a tree, beside a building, or into any area of consistent open shade. This instantly provides soft, diffused light that’s far more flattering.
    2. Turn Your Subject’s Back to the Sun: Instead of having the sun hit their face directly, position your subject with the sun behind them. This can create beautiful backlighting and prevent squinting. You’ll need to adjust your exposure (often overexpose slightly) or use a fill flash.
    3. Use a Diffuser: If you have one, hold a translucent diffuser between the sun and your subject. It acts like a portable cloud, softening the harsh rays directly. Even a thin white sheet can work in a pinch!

    These quick adjustments will immediately give you better photos than simply shooting head-on into the glare.

    How utterly splendid.

    So, Here Are Your Detailed Strategies for Taking Great Photos in Direct Sunlight!

    Now, let’s dive into more detailed, actionable photography tips that will empower you to consistently capture stunning photos in direct sunlight. These strategies go beyond quick fixes, giving you a comprehensive toolkit to master harsh light in various scenarios.

    Tip 1: Master the Power of Open Shade

    The simplest and often most effective way to manage harsh light is to remove your subject from it entirely. Open shade is your best friend.

    • What it is: Open shade refers to an area that is shaded from direct sunlight, but still open to the sky. Think under a large tree, on the shaded side of a building, or beneath an overhang. The light here is diffused, soft, and even because it’s bouncing off the open sky or nearby bright surfaces.
    • Why it works: It eliminates those unflattering, harsh shadows and blown highlights that direct sunlight creates. Your subject won’t be squinting, and skin tones will look much more natural and flattering for portrait photography.
    • How to find it: Look for large, consistent patches of shade. Be careful of ‘dappled light’ (patches of sun and shade) as this can be very distracting. Ensure the background behind your subject is also in consistent shade, or significantly darker than direct sun, to avoid a jarring contrast.

    Embracing open shade photography is a fundamental lighting solution for beginner photographers and pros alike, providing instant, beautiful results.

    Tip 2: Leverage Backlighting for Dramatic Effects

    Instead of fighting the sun, turn it into a creative tool! Backlighting involves placing your subject between your camera and the sun.

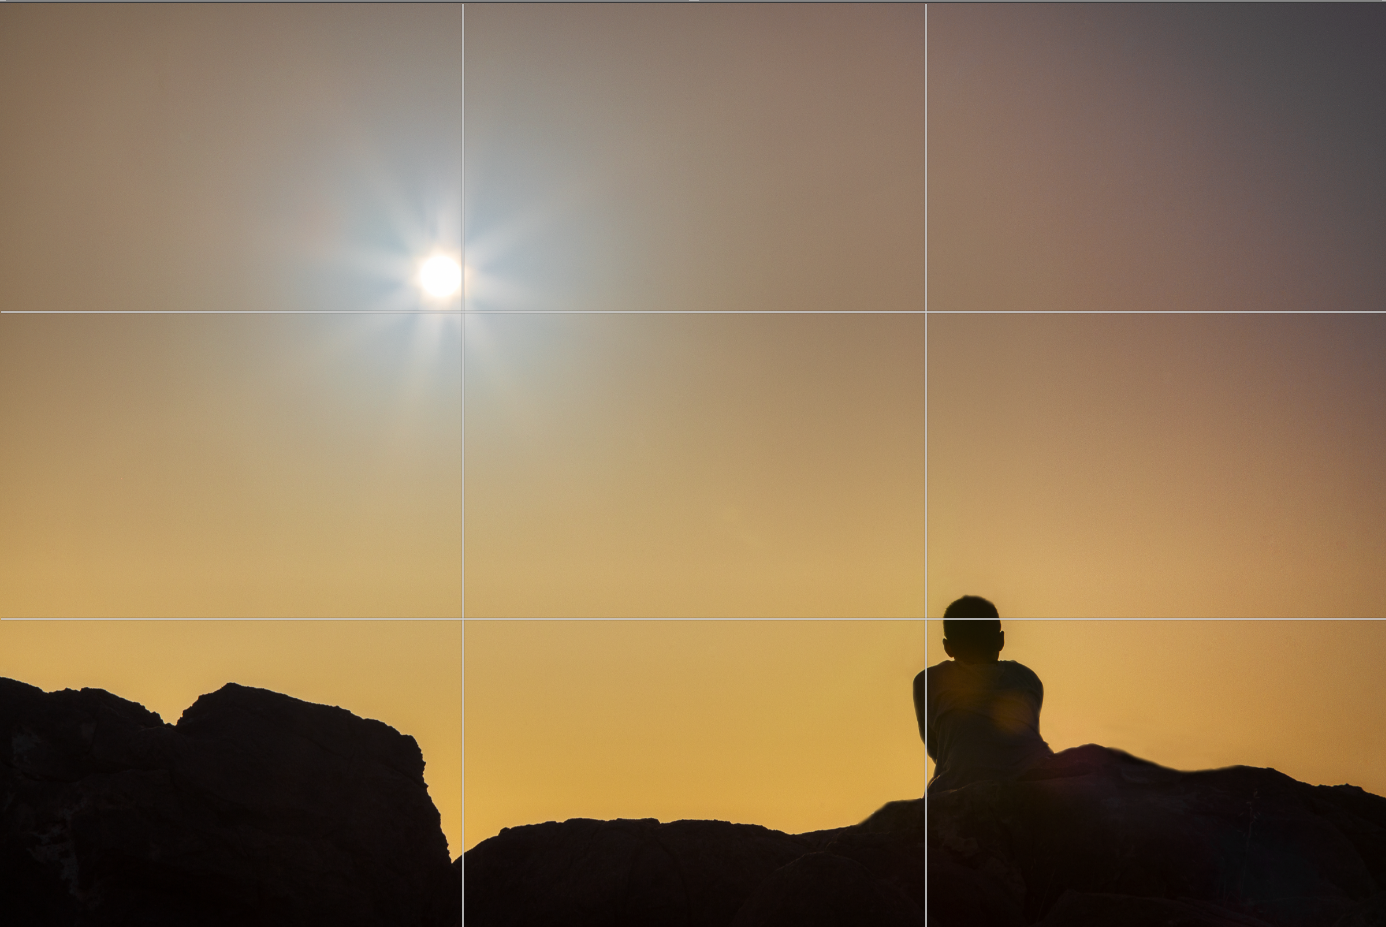
    • Creating Rim Light: When the sun is behind your subject, it creates a beautiful glowing outline around their hair or shoulders, known as rim light. This separates them from the background and adds depth and a dramatic, ethereal feel to your photos.
      • Exposure: Your camera will want to expose for the bright background, which will make your subject appear too dark. To compensate, use exposure compensation (typically +1 to +2 stops) to intentionally overexpose the scene, ensuring your subject is properly lit.
    • Creating Silhouettes: If you want a more dramatic effect, intentionally expose for the bright background (or under-expose relative to your subject). This will turn your subject into a dark, shapeless form against a bright, well-exposed background, creating a powerful silhouette. This is great for storytelling and emphasising shape over detail.
    • Preventing Lens Flare: When shooting into the sun, lens flare is common. Use a lens hood to block stray light from hitting the front element of your lens. You can also use your hand to block light if you don’t have a hood, as long as it’s out of frame.

    Backlighting is a powerful creative technique that transforms harsh light from a problem into a visually striking opportunity for impactful images.

    Tip 3: Employ Light Modifiers: Reflectors and Diffusers

    When natural shade isn’t an option, bring your own! Simple, affordable lighting accessories can make a huge difference in harsh light photography.

    • Reflectors: A photography reflector is a collapsible disc with various surfaces (silver, gold, white, black, translucent).
      • How to use: Position a reflector (held by an assistant or stand) to bounce direct sunlight back onto your subject’s face, filling in those harsh shadows.
        • White: Offers the softest, most natural fill light.
        • Silver: Provides a stronger, cooler, crisp fill light.
        • Gold: Delivers a warmer, more inviting fill light, great for skin tones.
    • Diffusers: The translucent surface of a reflector (or a dedicated large diffuser) can be held between the sun and your subject. It acts as a large softbox, literally diffusing the harsh direct sunlight and creating a soft, even light over your subject. This is excellent for portraits in bright sunlight.
    • Fill Flash: Yes, using flash in bright daylight! It sounds counterintuitive, but a subtle burst of flash can perfectly fill in harsh shadows on a subject’s face, balancing the exposure with the bright background. You’re simply adding light to where the sun isn’t reaching.
      • Technique: Expose your camera for the ambient background light first. Then, activate your flash, adjusting its power (using flash compensation) so it subtly illuminates your subject without looking artificial. This technique is brilliant for controlling contrast in high-contrast scenes.

    These lighting modifiers give you incredible control over light management and are essential tools for achieving well-exposed photos and professional results in challenging bright conditions.

    Tip 4: Optimise Camera Settings and Post-Processing

    Even with careful shooting, some harsh light scenes will require digital refinement. Your camera settings and post-processing workflow are crucial for success.

    • Shoot in RAW: This is vital for harsh light photography. RAW files contain significantly more image data (especially in highlights and shadows) than JPEGs. This extra data gives you far more flexibility in post-processing to recover detail in blown-out highlights and lighten crushed shadows without introducing digital noise.
    • Exposure Compensation: As mentioned, use your camera’s exposure compensation dial (the +/- button) to tell the camera to make the image brighter or darker. In direct sun, you might need to overexpose if your subject is in shadow, or underexpose if you want to protect bright skies.
    • Highlights and Shadows Sliders: In photo editing software (Lightroom, Photoshop, Snapseed, etc.), the “Highlights” and “Shadows” sliders are your best friends. They allow you to selectively lighten dark areas and darken bright areas, effectively reducing the overall contrast and recovering lost detail.
    • Local Adjustments: Use brushes, radial filters, or graduated filters in your editing software to make specific adjustments to problem areas. For example, you can selectively lighten a face that’s still a bit dark or subtly darken an overly bright patch of sky.

    By combining smart camera settings with powerful post-processing techniques, you can fine-tune your images and achieve truly optimal image quality even from challenging, harsh light captures.

    Tip 5: Creative Approaches: Silhouettes, Lens Flare, and Black & White

    Sometimes, instead of fighting harsh light, you can lean into its dramatic characteristics and use it creatively.

    • Embrace Silhouettes: When the sun is directly behind your subject and they are noticeably darker, don’t just correct it – create a silhouette! Expose for the bright background, letting your subject become a striking, dark shape, emphasising form and storytelling. This is excellent for graphic images and dynamic composition.
    • Intentional Lens Flare: While often undesirable, lens flare can be used as a creative effect in specific situations. A controlled, artistic flare can add a sense of warmth, dreaminess, or realism to your photos. Experiment by positioning the sun just at the edge of your lens, using a lens hood to manage its intensity.
    • Black & White Conversion: Harsh light naturally creates strong highlights and shadows, leading to intense contrast. This inherent contrast is perfect for black and white photography, where the focus shifts from colour to form, texture, and light patterns. Converting to black and white can remove the distraction of colour shifts caused by uneven lighting, emphasising the dramatic interplay of light and dark.
    • Look for Patterns: The sharp shadows created by harsh light can form intriguing geometric patterns or textures on buildings, walls, or the ground. Shift your focus to these abstract elements and capture impactful images that highlight the graphic quality of the light.

    These creative techniques demonstrate that direct sunlight isn’t always a problem to solve, but often an opportunity for unique and artistic photographic expression.

    What if I use a Phone to Take Photos?

    These principles for beating harsh light are just as relevant for mobile phone photography, and often, your phone’s auto-HDR features can be quite helpful!

    • Seek Shade First: The golden rule applies universally. Moving your subject into open shade is still the fastest way to get a great phone photo in bright conditions.
    • Tap to Expose: On your phone screen, tap on your subject’s face to ensure it’s correctly exposed. Your phone will usually adjust for that spot, often brightening your subject.
    • Use HDR Mode: Many modern phones have excellent automatic HDR (High Dynamic Range) capabilities. Ensure it’s active. HDR captures multiple exposures and merges them, helping to balance those blown highlights and dark shadows automatically.
    • Manual Control Apps: Consider using a third-party camera app that offers more manual control over exposure, allowing you to protect highlights or lift shadows more precisely.
    • Hand as a Lens Hood: Hold your hand or a small object just out of frame above your phone’s lens to block direct sun from hitting the glass. This simple trick can dramatically reduce lens flare and improve contrast in your phone photos.
    • Edit in-app: Use your phone’s built-in editing tools or apps like Snapseed or Lightroom Mobile to adjust “Highlights” and “Shadows” sliders, recovering detail in those challenging areas.

    Your smartphone is a powerful tool for everyday photography, and applying these harsh light tips will significantly elevate your mobile phone photography results.

    The Big Takeaway

    So there you have it! The sun, that big bright ball of fire, doesn’t have to be your photographic nemesis. By truly understanding the nature of harsh light and consistently applying these actionable shooting techniques—whether that’s finding open shade, embracing backlighting, strategically using reflectors or fill flash, or leveraging the power of post-processing—you can confidently step out and capture stunning photos with beautiful lighting in even the most challenging bright conditions.

    Remember, practice makes perfect in photography. So next time that midday sun is relentlessly beating down, don’t pack up your camera gear and head for the nearest pub. Instead, grab your camera and enthusiastically put these powerful, harsh light tips into action. Experiment, play, and actively seek to discover how you can expertly transform harsh light into incredible photographic opportunities, resulting in impactful images every time.

    What do I do?

    I photograph buildings and nice places. And buildings in nice places. I have a few reflectors that I have used when photographing people, but as I don’t photograph people anymore, I don’t use them. That is why they are in the loft.

    I try to avoid taking photos around midday, but many times this cannot be avoided. I don’t always have the luxury of picking the best time to take photos, so often I just have to make the best of what is there.

    So, for all you folks who say you should never take photos at midday, I say nonsense. For most of us, this is just not an option. Of course, use the best light you can, which is not at midday, but as I said, this is not always possible, which is why it is important that we learn to make the best of what we have, whatever that may be.

    And I always use a lens hood, even when it is cloudy. Well, why wouldn’t you? And let’s not forget circular polarising and neutral density filters, which I covered in the last two episodes. See, there is some thought to this!

    Next Episode

    Next week, we’ll be diving into Episode 210: How to Get Sharp Photos Every Time: Beyond Just Focusing. Yes, sharp photos. An important subject for sure.

    Make sure you’re subscribed so you don’t miss it!

    A quick plug for me and what I do.

    Well, why not? If I can’t plug myself on my podcast, where can I?

    You have found this podcast, so why not check out the podcast website, photographyexplainedpodcast.com?

    I have another photography website, rickmcevoyphotography.com, where I write blog posts about my photographs of buildings and other good stuff. On my courses page, you will find my course, How to Become A Real Estate Photographer. You can also find me on YouTube talking about my podcast and my blog – type my name in, and you will soon find me.

    Get an email from me.

    If you want a weekly email from me, fill in the box on any of my websites, and every Friday, you will read what I am thinking about photography-related.

    That’s enough of the self-promotion.

    Ask me a question

    If you have a question you want me to answer or just want to say hi, email me at sales@rickmcevoyphotography.co.uk, visit the podcast website, or text me from the podcast feed.

    It is always lovely to hear from you, dear listeners.

    This episode was brought to you by, wait for it, by a cheese and pickle sandwich, which I consumed before settling into my homemade, acoustically cushioned recording emporium.

    I’ve been Rick McEvoy. Thanks again for listening to my small but perfectly formed podcast (it says here) and for giving me 27 minutes of your valuable4 time. I reckon this episode will be about 20-22 minutes long after I have edited out the mistakes and other bad stuff. Blimey – a short episode which makes a nice change.

    Thanks for listening

    Take care and stay safe.

    Cheers from me, Rick

    That was the podcast episode

    Want to know more?

    Head over to the Start page on the Photography Explained Podcast website to find out more.

    And here is the list of episodes published to date – you can listen to any episode straight from this page which is nice.

    Let me know if there is a photography thing that you want me to explain and I will add it to my list. Just head over to the This is my list of things to explain page of this website to see what is on there already.

    Let me send you stuff

    I send out a weekly email to my subscribers. It is my take on one photography thing, plus what I have been writing and talking about. Just fill in the box and you can get my weekly photographic musings straight to your inbox. Which is nice.

    And finally a little bit about me

    Finally, yes this paragraph is all about me – check out my Rick McEvoy Photography website to find out more about me and my architectural, construction, real estate and travel photography work. I also write about general photography stuff, all in plain English without the irrelevant detail.

    Thank you

    Thanks for listening to my podcast (if you did) and reading this blog post (which I assume you have done as you are reading this).

    Cheers from me Rick

    Rick McEvoy Photography
  • Polarising Filters – What Are They? Do I Need One?

    Polarising Filters – What Are They? Do I Need One?

    Polarising filters attach to camera lenses and reduce reflections and glare, and can improve colour saturation. They can simply make your photos look better. What is not to love, eh? And they don’t cost a lot either.

    And I have a couple of these that I absolutely love.

    In this episode, I will tell you when, how, and why I use my polarising filters.

    In the last episode, I said that neutral density filters are like sunglasses for your camera lens—I think this applies even more to polarising filters.

    That was the super quick answery bit. How utterly splendid. Let’s get into this.

    But first, you can listen to the episode here

    Or keep on reading – entirely up to you.

    Hi, and a very warm welcome to Episode 208 of the Photography Explained podcast. I’m your host, Rick, and in each episode, I will try to explain one photographic thing to you in plain English in less than 27 minutes (ish) without the irrelevant details. Yes, really.

    I’m a professionally qualified photographer based in England with a lifetime of photographic experience, which I share with you in my splendid podcast.

    What are polarising filters?

    Firstly, how do you spell polarising? Here in England, it is with an S. In the US, the preferred spelling is with a Z. I will stick to the English version, ok? With an s that is.

    What does polarising mean?

    I searched for this answer, and apart from the other meaning, which is to divide people into opposing groups (nice bit of additional knowledge there, Rick), polarising changes the way light moves. I was hoping for a more definitive scientific explanation, but I will explain in practical terms what it means for us photographers.

    There are two types of polarising filters: linear and circular ones. To save time, I will say that I have never owned or used a linear polarising filter, so I will talk about circular polarising filters only.

    These are also abbreviated to CPL, which never really made sense to me. CPL is Circular Polarising? Move on, Rick, this is not important.

    How does a circular polarising filter work?

    Simple – point your camera at something, look through the viewfinder, rotate the filter and see what happens. Suppose those reflections of the sun on the sea disappear and are replaced by deeper colours that match the rest of the sea, which is the filter in action. Keep rotating, and you will return to the beginning, where the filter is not doing its stuff.

    Now, there is much more that I could say here about light rays, directions, angles, and what the filter is actually doing, but the reality is to rotate the filter and watch the magic happen. I don’t need the technical side of what is happening because I can see it with my own eyes, which is good enough for me.

    So I am going to move on. I will return some examples of how I use my polarising filters.

    What are Polarising filters made of?

    Glass or resin. Same as ND Filters. But mainly glass.

    And here is the thing that I did not know. Or did I know but have forgotten? A circular polarising filter has two pieces of polarised glass, one fixed and one that rotates.

    So when you rotate the filter, one layer of glass moves and one doesn’t. Ok, let’s move on.

    How much light is blocked by a Polarising filter?

    It varies with the filter, but there is generally about a 1.5-stop reduction in light getting through to the camera sensor.

    How do I attach a Polarising filter to my camera lens?

    Circular polarising filters are circular, so screw into the filter thread on the front of the lens. You can also use step-down rings to put a larger filter onto smaller lenses.

    That was my top tip in the last episode, which applies equally to polarising filters.

    How utterly splendid.

    Are Polarising filters expensive?

    I bought one last week for my Olympus 14-42mm pancake lens, a tiny lens with a 37mm filter thread. And it cost me a tenner.

    You can spend as much as you want to be honest, there is so much choice out there. The problem is choosing which one to buy. Go for a decent brand with good reviews.

    And the larger the filter, the more expensive it will be, which makes sense, right?
    If you are not sure if you want one or want to try one out, buy a cheaper brand and see how you get on.

    I bought a new one the other week as I did not have one for that lens, which I use on holiday. The pancake lens makes my Olympus camera so small and unobtrusive, saving space in my luggage.

    I will repeat myself from the last episode – buy the best gear you can afford, look after it, and it will serve you well for many years. I have had mine for well over a decade now.

    What can I do with a circular polarising filter?

    This is the good stuff. I will tell you what I use polarising filters for. And I am talking about what I did last week with that 37mm filter on the tiny pancake lens on the Olympus EM5.

    I had the great fortune to be on the wonderful island of Sal, in Cape Verde. It is located about 350 miles off the coast of Africa, level with Senegal.

    It was a family holiday, not a photography trip, so my photo-taking opportunities were limited. So I restricted my photography to my favourite place, the beach.

    The beaches in Cape Verde are wonderful. And there are lots of them. And the sand is wonderful. The colours in the sea are fantastic. And you can very quickly get to beaches without people on them.

    I love these beaches so much that I run there daily. This is a real treat for me, as with my ageing dodgy old knees, I can only run on soft surfaces, and I suffer when running on roads. It turns out that sandy beaches are perfect for me, so I do this.

    And when I am out running, guess what—I am looking for things to photograph. Yes, I am looking for that one photo when I go out running. I love it when things come together like this—me running on the beach and my one-photo rule.

    One thing that I wanted a photo of was simply the extent of the beach, and the colours of the water. And those lovely white fluffy clouds. Ideal fare for a circular polarising filter, which nicely cut the glare from the sun on the sea and enhanced the blues and greens nicely. And darkened the sky a touch, which is fine, and also made the clouds pop.

    An ideal use case for a circular polarising filter.

    I then used the same technique on my one photo, which was the photo of a small open hut at a jaunty angle. I captured this looking towards the sea, with a coconut and the Cape Verde flag in the composition -not planted by me – they were already there.

    And this gave the photo more depth and colour.

    Can’t believe that was already a week ago.

    I will post these photos on the podcast website after processing them. OK, that will be only 2 or 3 photos; that is all I want: the hut, and the general view in landscape and portrait orientation.

    Other uses of circular polarising filters.

    Other than using them on beach shots, I have used them to reduce the reflections of all sorts of things, including many buildings. You can significantly change how a building looks with careful use of a circular polarising filter. But you have to be careful – these photos will look different from those taken without the filter, so you must decide if that is OK. A set of images that look different does not form a coherent set, so you might decide to use the polarising filter for all those photos for consistency.

    If I am photographing a building for a client, I will either use no polarising filter or use it for all the shots.

    It just depends, but you need to be aware of it.

    Now, you will find it said that it works to reduce reflections on non-metallic surfaces only. That does not include things like painted cars, but it does include things like chrome bits. Have a go and see what I mean. But it works a treat on glass.

    They work a treat when photographing cars, reducing reflections from glass and painted metal, but again, you have to be careful and make sure that, if you are taking more than one photo, and if you are, why are you, dear listener? That you get consistency from one image to the next.

    They are also great for reducing glare from wet leaves, wet roads, and similar situations. They can make clouds pop. Of course, they help cut through reflections in water. They can make any photo with water look much better.

    And returning to landscape photography, reducing reflected light can enhance the colours we capture. And they can also help reduce haze.

    What is not to love?

    The problem with using a circular polarising filter

    Sometimes it isn’t easy to see what it is doing. With my non-technical head on, if I can’t see what the filter is doing, it might be because it isn’t doing anything. But, in theory, if I rotate the filter and look at something that has something shiny, then I should be good to go. That is what I do.

    Can’t I do this in post processing?

    You can replicate the increase in saturation, but you cannot replicate the polarising effect, as this is done by the filter blocking some of the light. So this happens when a photo is taken and cannot be added after in post-processing. Ok, some bright spark will tell me they can do this, but I can’t and don’t care. I prefer to do stuff like this when I take photos. Photography is not about spending hours changing photos on a computer, but about taking photos.

    Do the photos not look fake?

    Not really. Removing reflections and glare is fine. How could you possibly know that they were there if you removed them when you took the photo?

    Blue skies can look darker, but no more so than with you wearing a pair of polarising sunglasses. And that is a point I want to make again – what you are getting using a circular polarising filter is the same effect as wearing a pair of polarising sunglasses.

    So things look different, but fake? I will let you decide, but I am OK with this.

    Is using a polarising filter cheating?

    No. I don’t think so. We are using some science here to change the light that gets through to our camera sensors. We are doing this in a deliberate, conscious way. So no, it is not cheating, it is getting the best out of the light that is there, which is what photography is all about.

    Sometimes, saying that you have used a polarising filter may be required, but in the main, this is fine; this is not cheating.

    But remember this – I was going to sing this but stopped myself – maybe in the future!

    A circular polarising filter reduces circa 1-2 stops of light getting through. A 1/125th second shutter speed without a filter will become 1/30th second with one, so be aware.

    And also remember this.

    Just remember that photos taken using a circular polarising filter look different from photos taken without a circular polarising filter. Well, you’d hope so, right? Just be aware of this.

    But let’s not forget, all those photos we see with those amazing deep blue skies – guess how those photos were probably taken?

    Here’s something for you to do

    Get a cheap polarising filter that fits your favourite lens, get out there, and try it out and see what you think.

    And if you have a pair of polarising sunglasses, do what I do far too often—look at something, rotate your head left and right, and see what happens. Seriously, give this a try!

    And let me know how you get on.

    What if I use a phone to take photos?

    You can get clip-on circular polarising filters for phones. I did not know this. And no, I am not going to try this. I am fortunate enough to have a camera, so I don’t need to do it, but if all you have is a phone, you can have a play too.

    What do I do?

    I have told you so; I can move on. Just remember that photos taken with one of these filters will look different from those taken without. This might be important to you—it certainly is to me.

    And I look after my filters with the same care I do all my gear, which is why they last me so long.

    And that is what I do.

    Some thoughts from the last episode

    Neutral density filters. How utterly splendid. So much so that I bought a variable ND filter to have a play with, but I haven’t had a chance to use it yet, though.

    Next episode

    Crop factors explained. I need to do this. Unless one of you dear listeners comes up with something better. Get your questions in – the first one I can make an episode out of, I will do just that with, and give you a big old shout-out on that episode.

    Crop factors can wait, with your help…..

    Oh no, it isn’t. I changed my mind. Taking Great Photos in Direct Sunlight: 5 Tips For Beating the Harsh Light.

    A quick plug for me and what I do.

    Well, why not? If I can’t plug myself on my podcast, where can I?

    You have found this podcast, so why not check out the podcast website , photographyexplainedpodcast.com? I have another photography website, rickmcevoyphotography.com, where I write blog posts about my photographs of buildings and other good stuff. On my courses page, you will find my course, How to Become A Real Estate Photographer. You can also find me on YouTube talking about my podcast and my blog – type my name in, and you will soon find me.

    Get an email from me.

    If you would like a weekly email from me, pleasefill in the box on any of my websites, and every Friday, you will read what I am thinking about photography-related.

    That’s enough of the self-promotion.

    Ask me a question

    If you have a question you would like me to answer or you just want to say hi, email me at sales@rickmcevoyphotography.co.uk, visit the podcast website, or text me from the podcast feed.

    It is always lovely to hear from you, dear listeners.

    This episode was brought to you by the Cape Verde Tourist Board. Ha, not really, but I am delighted to be able to promote this wonderful place. No, this episode was brought to you by, wait for it, by a cheese and pickle sandwich and a bag of salt and vinegar crisps. Yes, I consumed it before settling in my homemade, acoustically cushioned recording emporium. 

    I’ve been Rick McEvoy. Thanks again for listening to my small but perfectly formed podcast (it says here) and for giving me 27 minutes of your valuable time. I reckon this episode will be about 20-22 minutes long after I have edited out the mistakes and other bad stuff. Blimey – a short episode which makes a nice change.

    Thanks for listening

    Take care and stay safe.

    Cheers from me, Rick

    That was the podcast episode

    Want to know more?

    Head over to the Start page on the Photography Explained Podcast website to find out more.

    And here is the list of episodes published to date – you can listen to any episode straight from this page which is nice.

    Let me know if there is a photography thing that you want me to explain and I will add it to my list. Just head over to the This is my list of things to explain page of this website to see what is on there already.

    Let me send you stuff

    I send out a weekly email to my subscribers. It is my take on one photography thing, plus what I have been writing and talking about. Just fill in the box and you can get my weekly photographic musings straight to your inbox. Which is nice.

    And finally a little bit about me

    Finally, yes this paragraph is all about me – check out my Rick McEvoy Photography website to find out more about me and my architectural, construction, real estate and travel photography work. I also write about general photography stuff, all in plain English without the irrelevant detail.

    Thank you

    Thanks for listening to my podcast (if you did) and reading this blog post (which I assume you have done as you are reading this).

    Cheers from me Rick
    Rick McEvoy Photography
  • Neutral Density Filters – What Are They? Do I Need One?

    Neutral Density Filters – What Are They? Do I Need One?

    Neutral density filters attach to camera lenses and reduce the amount of light getting through to your camera sensor without affecting the colours (hopefully). Neutral density filters allow you to take long exposures in daylight, allowing you to flatten water and make clouds super cool, streaky, blurry, amongst other things. Neutral density filters allow you to use wide apertures in bright conditions and can also prevent you from getting overexposed photos in bright conditions.

    And I have one that I absolutely love.

    You can think of neutral density filters as sunglasses for your camera lens – yes, really.

    And that was the answery bit. How utterly splendid.

    You can listen to the episode here

    Or keep on reading – entirely up to you

    Hi, and a very warm welcome to Episode 207 of the Photography Explained podcast. I’m your host, Rick, and in each episode, I will try to explain one photographic thing to you in plain English in less than 27 minutes (ish) without the irrelevant details. Yes, really.

    I’m a professionally qualified photographer based in England with a lifetime of photographic experience, which I share with you in my splendid podcast.

    Right – let’s get straight into this.

    Firstly, what are they? What are neutral density filters?

    Neutral density filters are also called ND filters. And that is what I will call them for the rest of this episode. Saves me typing the words. Neutral means the colours do not change, and the density bit refers to how much light is blocked.

    But the colours can change. With my ND Filter, I sometimes get a blue cast with long exposure captures that I have to correct. So, you will need to work out if your ND filter affects the colours or not. This is easy enough – take a photo without the ND filter and then take one with it and compare them. That is their one downside, but it is manageable if you know what you need to do and how to do it.

    What are ND filters made of?

    Glass or resin.

    How much light is blocked by an ND Filter?

    It depends.

    • An ND2 filter gives a 1-stop reduction in light.
    • An ND4 filter gives a two-stop reduction in light.
    • An ND8 gives a three-stop reduction.
    • An ND16 gives a four-stop reduction.
    • An ND32 gives a five-stop reduction.
    • An ND64 gives a six-stop reduction.
    • And an ND1000 gives a 10-stop reduction. And that is what I have. Yes really.

    I don’t love the ND2, etc term. An ND2 filter reduces the light getting through by half, the ND4 by a quarter, the ND8 by an eighth, etc. But this does not mean much to me.

    I go with the stop reduction instead. Which, in my case, is 10 stops. Stops mean something to me. Quarters and eighths, etc, not so much.

    A stop is a halving or doubling of light by the way. It all amounts to the same.

    But whatever you use, the higher the number, the greater the reduction in light.

    Filters and stops – the important bit.

    This is important as we need to know what is going on with the exposure. A 1-stop adjustment can be made by

    Using an ND2 filter.

    • Changing the aperture from f/8 to f/11, reducing the amount of light getting through by one stop.
    • Changing the shutter speed from 1/125th second to 1/60th second, reducing the amount of light getting through by one stop.

    These adjustments all reduce the amount of light getting through to the camera sensor. And let us not forget ISO.

    • Changing the ISO from 200 to 100 gives the same overall effect as the changes above.

    A practical explanation of using an ND Filter

    This is the complicated bit. If you are in auto or semi-auto picture-taking mode, you don’t have to make any adjustments, but you need to know what is going on.

    Let’s take a typical exposure.

    • 1/250th second, f/8, ISO100.

    Add an ND filter giving a one-stop reduction in light, and to get the correct exposure, you need to either.

    • Reduce the shutter speed by one stop to let one stop more light in – so you change from 1/250th second to 1/125th second – more time, more light.
    • Change the aperture by one stop to a larger aperture, letting more light in – so you change the aperture from f/8 to f/5.6 – a larger opening means more light.
    • Or change the ISO to 200, which is one stop brighter.
    • But add a 10-stop ND filter and you will need to reduce the shutter to, wait for it – 4 seconds! Yes, really. 1/250th second to 4 seconds. And 1/125th second becomes 8 seconds. And 1/60th second becomes 16 seconds. 16 seconds. This is serious stuff!

    Variable ND Filters

    You can get variable ND Filters, with typical ranges being 2-5 stop reductions. I quite fancy one of these, but to be honest, I like my extreme 10-stop filter so much I have never got beyond that.

    How do I attach an ND filter to my camera lens?

    There are two different types of filters, ones that screw direct to the lens, and ones that have a holder that attaches to the lens that you put the filter into.

    Filter holders are great; you can use one filter and holder with different-sized adaptor rings. My expensive ND filter comes with a holder, so I can use the same filter with my Canon 17-40mm lens, which has a 77mm filter thread size, and also on my Olympus 12-40mm lens, which has a 62mm filter thread.

    This is a square filter with a square filter holder. And, not surprisingly, filters that screw directly onto lenses are round.

    Yes, the big holder looks odd on the small camera and is a tad counterintuitive when thinking about reasons why you may have a smaller camera, but this is for occasional use. It’s fine, this does not bother me.

    I have one filter, two adaptor rings, one 62mm and one 77mm, and one holder.

    Step down rings – my top tip for you.

    If you want an ND filter that screws into your filter thread, and you buy a filter for the largest lens that you have, you can then buy a step-down ring which means that you can use say a 77mm filter, with a step-down ring, on a lens with say a 62mm filter thread.

    How utterly splendid.

    Are ND filters expensive?

    As with any question related to anything in photography, it depends. I have a Lee Big Stopper, giving me a whopping 10-stop reduction. And no, I am not being paid to say this – I bought this with my own money. Checking a well-known online retailer, this goes for around £100. Not cheap, I know. But I bought mine many, many years ago, and it is as good now as the day I bought it.

    And the holder goes for around £30.

    I say around because there are many different products and prices, but you get the idea.

    And there are many pretty good, cheaper brands these days – check them out if you fancy buying one of these splendid accessories.

    I always say buy the best gear you can afford, look after it, and it will serve you well for many years. I have had mine for well over a decade now.

    But, if you are not sure, buy a cheap one and give that a go and see if this is for you. But there is a higher chance of getting a colour cast with cheaper filters. And a reduction in image quality, so choose carefully.

    What are graduated ND Filters?

    These are part clear, part ND, typically half and half with a transition from one to the other in the middle. You can use these to balance out an exposure when taking a photo with a dark foreground and a light sky, or a sunset over the sea. Or similar.

    There are lots of different types, strengths, locations and hardness or softness of transition. And you need holders for these.

    What can I do with an ND filter?

    Take super long exposures in broad daylight. This is what I love to do. I use my ND filter to take long exposures of any kind of water. And let’s not forget clouds.

    Long exposure photography in broad daylight

    This is what I use my ND filter for. 1/250th second quickly becomes 4 seconds. And you can quickly get down to 8, 16, even 32 seconds. And this is a complete game changer.

    Long exposures in broad daylight. And even longer exposures in low light, let’s not forget.

    I have photographed many things with my ND filter, including

    • A jetty on a Greek island with a super flat sea.
    • A building with dreamy moving clouds.
    • Various rivers with super flat water.
    • Waterfalls with lovely blurry water.
    • Moving vehicles.
    • Moving trains.
    • All sorts of stuff.

    So, think of any photo with something moving in it, and how you can transform that photo by making the exposure loads longer. The possibilities are endless, so give it a go and let me know how you get on.

    And if you have a 2-stop and a 3-stop ND Filter, you can stack them to get five stops, but the more things we put in front of our lenses, the higher the chances of a reduction in image quality.

    Shallow depth of field

    Sometimes you can’t get shallow depth of field because the light is too bright, and if you use a large aperture, your photos will be overexposed. An ND filter quickly fixes this. Same if it’s so bright, your photos are overexposed.

    Here’s something for you to do

    Get a cheap ND filter that fits your favourite lens and get out there and have a go, and see what you think. To get the most out of one of these, you will need a tripod, though. But, if you don’t have a tripod, don’t let that stop you – you can use anything to rest a camera on.

    Back in the day, I used to own a bean bag, and that worked just fine. There is always another way, so like I say, don’t let not having a tripod be a barrier. Get creative. And let me know what tripod substitute you come up with.

    What if I use a phone to take photos?

    Hmmmm. Well, I don’t know. So, I had a look. And guess what – you can get clip-on ND filters for phones. I don’t fancy doing this myself, but if you do, why not give one a go? I believe you will have to get an app, though, to have control over the shutter speed.

    Not for me – too fiddly. I have cameras for all that faffing around, of course.

    What do I do?

    I use a 10-stop ND filter and absolutely love it. I have one filter holder and two adaptor rings for the lenses that I use with my ND filter.

    I look after my ND filter with the same care I do all my gear, which is why this filter has lasted me so long.

    But there is an issue with using a 10-stop filter. Put that on your lens, and you can’t see much. It is virtually impossible to compose a photo as it is so dark. And focusing becomes more of a challenge too.

    Which is why when I am using my 10-stop ND Filter, I put my camera on a tripod. I compose and focus without the filter in the holder, then slide the filter in and then take the photo. I am using AV Mode, so I have set the aperture, and the camera chooses the shutter speed.

    I also use back-button focus when I am taking photos using my ND Filter, and the built-in camera self-timer to make sure every long exposure photo I take is still nice and sharp.

    So, all good.

    But this is one time when I might well use manual mode and work out the settings myself, with the aid of an app, of course. No need to work this out the hard way these days!

    Now how you do this with a screw in filter I have no idea.

    And that is what I do.

    Some thoughts from the last episode

    21 composition tips to help take better photos of buildings. How utterly splendid. These were the things that came into my head as I wrote this episode. It was never planned to be 21; that is what I ended up with. And what an excellent episode it was, too. If I do say so myself.

    Next episode

    Same question, but this time about polarising filters. The other filter that I have. Yes, I have two filters and two filters only.

    Polarising Filters – What Are They? What Do They Do? Do I Need One?

    A quick plug for me and what I do.

    Well, why not? If I can’t plug myself on my podcast, where can I?

    You have found this podcast, so why not check out the podcast website photographyexplainedpodcast.com? I have another photography website, rickmcevoyphotography.com, where I write blog posts about my photographs of buildings and other good stuff. On my courses page, you will find my course, How to Become A Real Estate Photographer. You can also find me on YouTube talking about my podcast and my blog – type my name in, and you will soon find me.

    Get an email from me.

    If you want a weekly email from me, fill in the box on any of my websites, and every Friday, you will read what I am thinking about photography-related.

    That’s enough of the self-promotion.

    Ask me a question

    If you have a question you would like me to answer or you just want to say hi, email me at sales@rickmcevoyphotography.co.uk, visit the podcast website, or text me from the podcast feed.

    It is always lovely to hear from you, dear listeners.

    This episode was brought to you by a cheese and pickle sandwich and a bag of salt and vinegar crisps. Yes, I consumed it before settling in my homemade, acoustically cushioned recording emporium. 

    I’ve been Rick McEvoy. Thanks again for listening to my small but perfectly formed podcast (it says here) and for giving me 27 minutes of your valuable time. I reckon this episode will be about 20-22 minutes long after I have edited out the mistakes and other bad stuff. Blimey – a short episode which makes a nice change.

    Thanks for listening

    Take care and stay safe.

    Cheers from me, Rick

    That was the podcast episode

    Want to know more?

    Head over to the Start page on the Photography Explained Podcast website to find out more.

    And here is the list of episodes published to date – you can listen to any episode straight from this page which is nice.

    Let me know if there is a photography thing that you want me to explain and I will add it to my list. Just head over to the This is my list of things to explain page of this website to see what is on there already.

    Let me send you stuff

    I send out a weekly email to my subscribers. It is my take on one photography thing, plus what I have been writing and talking about. Just fill in the box and you can get my weekly photographic musings straight to your inbox. Which is nice.

    And finally a little bit about me

    Finally, yes this paragraph is all about me – check out my Rick McEvoy Photography website to find out more about me and my architectural, construction, real estate and travel photography work. I also write about general photography stuff, all in plain English without the irrelevant detail.

    Thank you

    Thanks for listening to my podcast (if you did) and reading this blog post (which I assume you have done as you are reading this).

    Cheers from me Rick
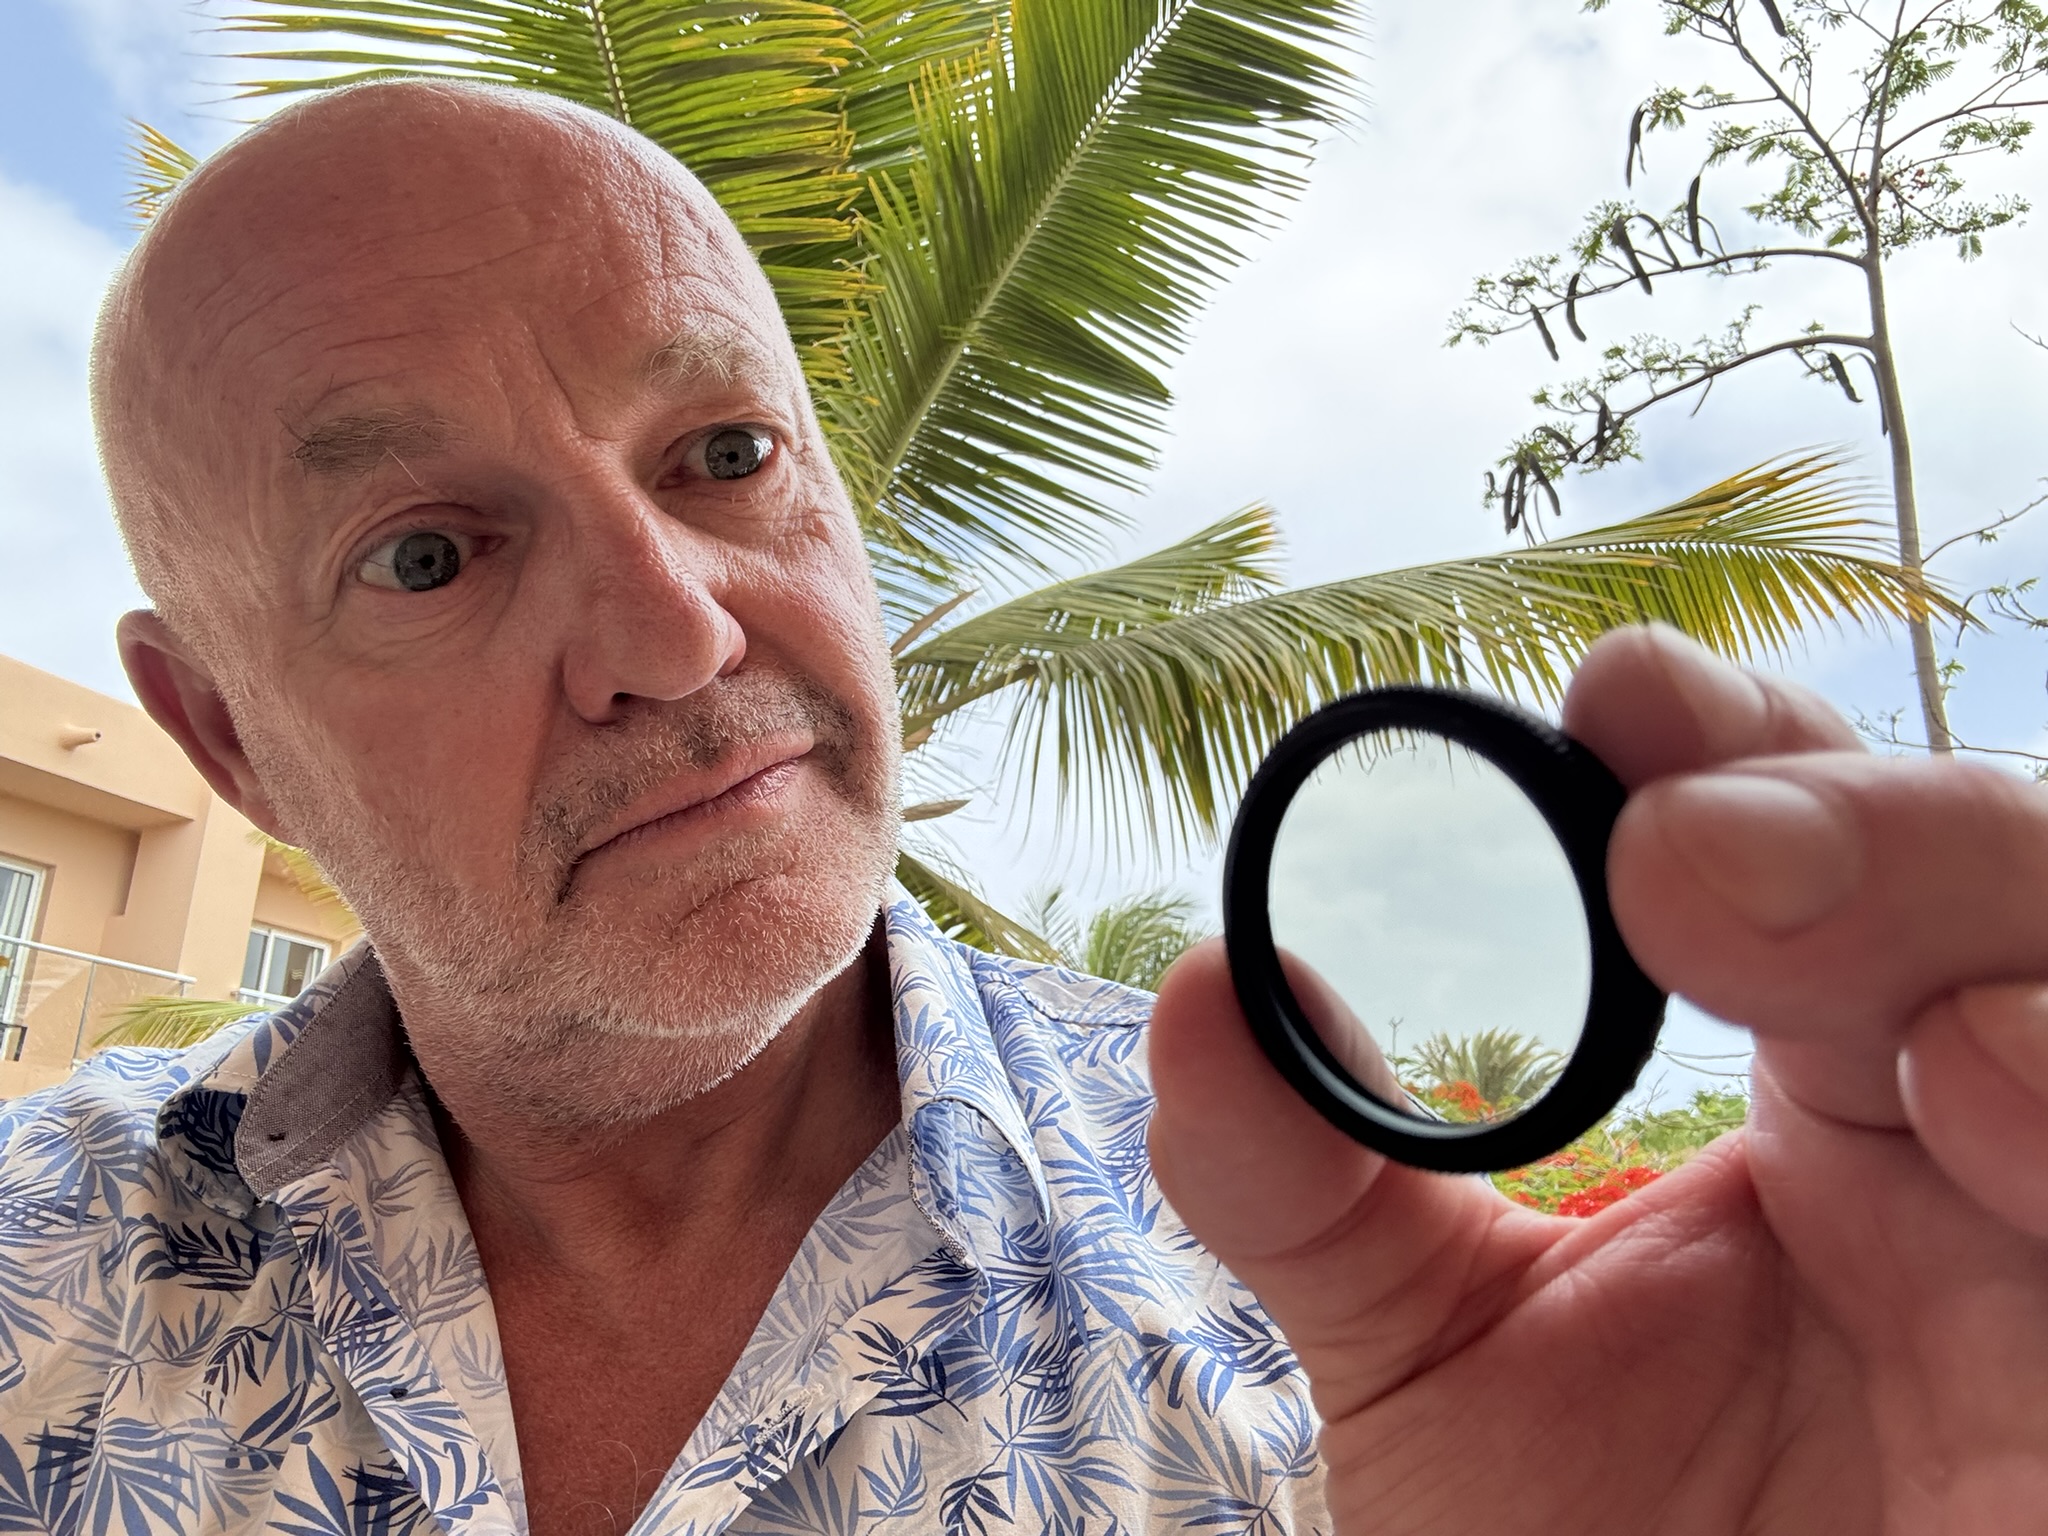
    Rick McEvoy Photography
  • 21 Composition Tips For Better Photos Of Buildings

    21 Composition Tips For Better Photos Of Buildings

    Take one photo and get the best composition you can

    1. Use the rule of thirds
    2. Take a photo, then try a different focal length to get a different look
    3. Take photos from different angles
    4. Move back and forwards
    5. Use leading lines
    6. Find the best light
    7. Capture intricate architectural details
    8. Fill the frame
    9. Use negative space
    10. Convey the sense of scale of a building
    11. Try a long exposure
    12. Play with depth of field
    13. Find interesting subjects to photograph
    14. Don’t be put off by overcast days
    15. Give tilt-shift lenses a go
    16. Explore old buildings
    17. Go wider to capture the entire building, and a bit more
    18. Get the building vertical
    19. Then do this
    20. Choose a particular building and get to know it

    And that was the answery bit. How utterly splendid.

    You can listen to the episode right here

    Or keep on reading – entirely up to you.

    Hi, and a very warm welcome to Episode 206 of the Photography Explained podcast. I’m your host, Rick, and in each episode, I will try to explain one photographic thing to you in plain English in less than 27 minutes (ish) without the irrelevant details. Yes, really.

    I’m a professionally qualified photographer based in England with a lifetime of photographic experience, which I share with you in my splendid podcast.

    I will now go through these 21 tips that will help you take better photos of buildings. Most are composition-related, but I did stray a bit with some of them. They are all good stuff, all the same! And they are in the order that came into my head when I wrote this.

    1 – Take one photo and get the best composition you can

    Yes, this again. This is still a great way to approach taking photos – just try to take the best one photo that you can of a building. If you could only take one photo of a building, which one would it be? Think about this and try to get that one photo. Once you have done that, move on. Ok, if you want to take another photo of a different part of the building, that is fine, but get that one photo first.

    2 – Use the rule of thirds

    The rule of thirds helps place a building within the viewfinder. And if you can add the 3×3 grid to your camera LCD screen, even better, as the horizontal lines and vertical lines will help you get the building aligned correctly, saving you time later. We should always be aiming to get the best photos that we can in camera, rather than relying on fixing things later.

    3 – Take a photo, then try a different focal length to get a different look

    Different focal lengths give different perspectives and depths of field. You can use different focal lengths from different positions, but with the same composition. The different focal lengths will give different outcomes. Take a photo at 50mm, then walk back and take the same photo with a 200mm focal length, then walk forward and take the same photo with a 28mm focal length and compare the results. While doing this, try different apertures each time you take photos, and you might find something different that you like. We shouldn’t restrict ourselves to wide-angle lenses for photos of buildings, just as with landscape photography. You can use a telephoto lens to take photos of buildings.

    4 – Take photos from different angles

    I start face on and central, and go left and right and up and down if I can, to try to find an interesting or new view of a building. Down can be somewhere else, or on the floor. Up could be somewhere else, or 5m above the ground with my camera stuck on a painter’s pole. Yes, I have a painters pole and an attachment that screws on the end of the pole that fits the tripod thread on the my camera. Using the Canon app and a bit of ingenuity, I can take photos of a building from 5m above ground level, which can make a huge difference. Think about it. If you are photographing a two-storey building, you can place your camera on the first floor level, giving a different perspective.

    You have to be careful using a painter’s pole in public spaces, though! But it is still safer than using a drone, which is a no-no in occupied public spaces.

    5 – Move back and forwards

    As well as doing what I said with different focal lengths, move backwards to photograph the building in its environment, this is a context photo. The design of new buildings will factor in adjacent buildings as part of the consent process. Planners require consideration of the impact of a building on the environment in which it will be placed, and this is great to identify and capture.

    And you can move forward and get compositions of parts of the building, including detail shots.

    6 – Use leading lines

    Buildings, and the bits around them, have lines within them, and you can use these to guide the eye. Think of footpaths, planting, anything around the building that you can use to frame a building and direct the eye wherever you want to. And then there are, of course, the natural lines within a building that can be used.

    This is a great compositional consideration when photographing buildings – use the lines that are there to influence your composition.

    7 – Find the best light

    Photography is drawing with light. I think I have said this before. Just saying. So, find the best light for that one photo of a building. This is one of the benefits of just trying to get one photo – you can work out where the best light is and when, as our free overhead light source moves throughout the day. So, the time of day and how the light relates to a building need some careful consideration.

    And we need to think beyond the headline times, golden hour, blue hour, etc. We have to be able to take photos during the day – well, I do anyway! 

    8 – Capture intricate architectural details

    Some buildings will have amazing, intricate details. Find them and capture them as details. They can often get lost in the sheer scale of a building. To find them, research before you go to a building, or when you get there, have a good old look and see what you can find. This is what I prefer to do, although I know doing research makes sense, as I do not know what I am missing by not doing this. I am just not very good at researching places before I go to them. As my wife knows all too well….

    9 – Fill the frame

    Fill the frame with that lovely building, make it the star of the show. Exclude everything else. And then try this.

    10 – Use negative space

    Move back, use the space around the building to make it breathe. And see which you prefer. There is no right or wrong answer here. We will all have our own thoughts and preferences, but you need to do both to work out which you prefer.

    11 – Convey the sense of scale of a building

    A really effective way of doing this is to include something that is familiar to us, that clearly shows the scale of a building. A person works perfectly for this. Take a photo of a massive building with a person in front of it, and it is easy to appreciate the size and scale of the building. If there aren’t any people about, or you are worried about having strangers in your photos, then why not include yourself? This could become your thing, so give it a try. Either use the self-timer (if you can get where you need to be in less than 10 seconds) or get a decent remote release. Sorted. How utterly splendid. I love doing this.

    12 – Try a long exposure

    Why a long exposure photo of a building? Well, if there are moving clouds, you can blur them, giving your photo of that building a completely different feel. One way to do this is using a neutral density filter – more on that in the next episode. Good link, Rick, very slick.

    13 – Play with depth of field

    When photographing a building, you need to make sure there is enough depth of field to make the entire building sharp. Alternatively, reduce the depth of field so that part of a building is sharp, or a tiny single element of the building. There is a lot that you can do with depth of field, especially if you combine this with creative placement of yourself and creative composition. It is easy to forget that doing anything other than having all the building sharp is a possibility, so have a play around and see what you get.

    14 – Find interesting subjects to photograph

    I wouldn’t spend too much time on a boring building. I would spend time on something interesting, though. And indeed, this is what I do. This could be architecturally, construction-wise, or locationally interesting. Or a famous building. A boring but famous building is interesting in a different way from an architecturally interesting building.

    If you want to take interesting photos, find something interesting to photograph!​

    15 – Don’t be put off by overcast days

    I live in England. We know clouds too well. But I don’t let them put me off. I embrace and love clouds and make them part of a photo, part of the composition. I would find blue skies boring – I keep asking if living somewhere with permanent blue skies is boring or not, but I’m still waiting for someone to tell me.

    Clouds are a photographer’s friend, and let’s not forget that when you have moving clouds, you have other creative opportunities to explore, which I mentioned before.

    16 – Give tilt-shift lenses a go

    Tilt-shift lenses are specialist lenses that serious architectural photographers use. I used to have one. But I sold it and manage in other ways. The problem I had was that it was a manual focus lens, and when you get to my age and with my eyesight, this is a challenge for sure. I wish I had persisted, though, and I plan to buy another one sometime.

    With a tilt-shift lens, in simple terms, you can photograph a tall building without the converging verticals. It is a wondrous thing to be able to do. The more I think about this, the more I want one of these marvels again. One day, Rick, one day, the Canon 17mm TSE lens will be mine.

    17 – Explore old buildings

    I love old buildings. Old buildings provide so much interest. Old buildings have histories, stories they can tell. I don’t look at modern buildings the same way I look at old buildings. As clever as modern buildings are, they are just not the same for me. So, find an old building somewhere and explore what it has to offer, and you might be surprised by what you find. Old buildings have ageing on their side too, which provides an endless source of interesting stuff that we can capture. An endless variety of designs, materials and construction techniques from over the years make old buildings amazing subject matters. 

    But always be careful, make sure your exploring is safe, and if you are not sure, do not proceed. No photo is worth an injury. Ever. And even more so with derelict buildings. Photograph them from the outside, but do not go into them – they are dangerous places that we should not be in.

    18 – Go wider to capture the whole building, and a bit more

    You have to go wide to get all of a large building in. And you need to go even wider, unless you are using a tilt-shift lens that is. Why? Well, you can’t photograph a large building without getting converging verticals, so you need the extra space around it for what I am about to come on to. I know I have said this before, but this is worth repeating. You have a building that is leaning in and loads of space around it – what next?

    19 – Get the building vertical

    Very important. Unless you are photographing the Leaning Tower of Pisa, that is. And if you want to know more about me photographing the Leaning Tower of Pisa, or Tower of Pisa as it is actually called, I wrote about this in an email I sent to subscribers. If you want that email, let me know. And subscribe to my email list to get a weekly email from me. More on that later.

    But most buildings are built straight and true, and we need to accurately capture this. Get the horizontal lines level, and the vertical lines vertical, which for tall buildings is often a combination of going back wide enough to capture the complete building and giving enough working space to make the building vertical in post processing. This is editing that is fine, as you can’t normally photograph a tall building correctly – it is simply impossible. Yes, this is acceptable photo editing manipulation.

    20 – Then do this

    Get your building vertical. And does it look normal? Quite often, they do not, and if so, I like to give a little lean back to make things look more normal. We are used to looking at tall buildings that have converging verticals, so having a building look ramrod vertical, whilst technically correct, just might look odd. So, try this and see what you think.

    21 – Choose a particular building and get to know it

    If you can pick a building that you can get to easily, keep going back to it and trying new things. Well, all of the above, to be honest. And once you have adopted a building of choice that you can easily get to, keep on going back at different times of the day and also different times of the year, as the conditions will vary over the course of days and a year. Unless you are in a wall-to-wall sunshine location – and if you are, is it boring? Let me know, dear listener.

    What if I use a phone to take photos?

    Basically, most of the above applies. Phones come with wider-angle lenses these days – my iPhone has a wide-angle lens that purports to be a 13mm focal length, which equates to a very wide angle focal length with a full-frame camera.

    The problem with taking photos with a phone for me is getting the composition bang on – I take my time but never seem to get buildings as level and vertical as I do with my camera, even with the grid lines to help me.

    So, take care when you are composing photos of buildings with a phone.

    What do I do?

    I photograph buildings. I am an architectural photographer, and I love architecture photography, building photography, construction photography, call it what you want, I love it. I use a full-frame Canon 6D with a 17-40mm lens for most of my photos of buildings. And most of the time, I use the 17mm focal length, which I love. There is no reason why I can’t go with a 17mm tilt shift lens, really other than justifying the cost, and it stopping me from buying other stuff that I might need more. And there is the manual focus issue that I have to get over!

    I love taking photos of buildings with my camera, but not so much with my phone, which I mentioned before.

    I enjoy trying different angles and viewpoints and always try to get something a bit different. And I normally try to get one photo, then move on to something else. Move on, Rick.

    And that is what I do.

    Some thoughts from the last episode

    Well, it was rather splendid, wasn’t it? I use a tripod for photos of buildings, too. And I take photos of buildings in a very similar way to how I take landscape photos. Composition-wise and technically. And gear-wise, too, which is nice.

    Next episode

    ND Filters – What Are They? What Do They Do? Do I Need One? Yes, a real change. I wrote about this in my weekly email and decided that I want to cover these in their own episode. I have one ND filter, ND being short for neutral density, but it is one of my favourite bits of gear. So, looking forward to that.

    A quick plug for me and what I do.

    Well, why not? If I can’t plug myself on my podcast, where can I?

    You have found this podcast, so why not check out the podcast website photographyexplainedpodcast.com? I have another photography website, rickmcevoyphotography.com, where I write blog posts about my photographs of buildings and other good stuff. On my courses page, you will find my course, How to Become A Real Estate Photographer. You can also find me on YouTube talking about my podcast and my blog – type my name in, and you will soon find me.

    Get an email from me.

    If you want a weekly email from me, fill in the box on any of my websites, and every Friday, you will read what I am thinking about photography-related.

    That’s enough of the self-promotion.

    Ask me a question

    If you have a question you would like me to answer or you just want to say hi, email me at sales@rickmcevoyphotography.co.uk, visit the podcast website, or text me from the podcast feed.

    It is always lovely to hear from you, dear listeners.

    This episode was brought to you by a cheese and pickle sandwich and a bag of salt and vinegar crisps. Yes, I consumed it before settling in my homemade, acoustically cushioned recording emporium. 

    I’ve been Rick McEvoy. Thanks again for listening to my small but perfectly formed podcast (it says here) and for giving me 27 minutes of your valuable time. I reckon this episode will be about 30 minutes long after I have edited out the mistakes and other bad stuff.

    Thanks for listening

    Take care and stay safe.

    Cheers from me, Rick

    That was the podcast episode

    Want to know more?

    Head over to the Start page on the Photography Explained Podcast website to find out more.

    And here is the list of episodes published to date – you can listen to any episode straight from this page which is nice.

    Let me know if there is a photography thing that you want me to explain and I will add it to my list. Just head over to the This is my list of things to explain page of this website to see what is on there already.

    Let me send you stuff

    I send out a weekly email to my subscribers. It is my take on one photography thing, plus what I have been writing and talking about. Just fill in the box and you can get my weekly photographic musings straight to your inbox. Which is nice.

    And finally a little bit about me

    Finally, yes this paragraph is all about me – check out my Rick McEvoy Photography website to find out more about me and my architectural, construction, real estate and travel photography work. I also write about general photography stuff, all in plain English without the irrelevant detail.

    Thank you

    Thanks for listening to my podcast (if you did) and reading this blog post (which I assume you have done as you are reading this).

    Cheers from me Rick

    Rick McEvoy Photography
  • 11 Landscape Photography Composition Tips That Will Instantly Improve Your Shots

    11 Landscape Photography Composition Tips That Will Instantly Improve Your Shots

    Do you want to take more interesting landscape photos? Well, I do, and I hope that you do too. It is too easy to go somewhere and take average, boring photos of something you never do anything with. I have taken loads of these myself, so don’t worry. And it is so easy to take the same photo of something we have all seen a thousand times. Let’s not do any of that.

    No, there is so much more that we can do, and in this episode, I am going to tell you 11 things you can do to help you take better landscape photos.

    And that was the answery bit.

    How utterly splendid.

    And yes, this is the same intro as the last episode, which was all about travel photography. Well, why not, eh? But only the intro is the same.

    You can listen to the episode right here

    Or keep on reading – entirely up to you.

    Hi, and a very warm welcome to Episode 205 of the Photography Explained podcast. I’m your host, Rick, and in each episode, I will try to explain one photographic thing to you in plain English in less than 27 minutes (ish) without the irrelevant details. Yes, really.

    I’m a professionally qualified photographer based in England with a lifetime of photographic experience, which I share with you in my splendid podcast.

    Right here are those 11 things that I will be talking about in this episode. See, this isn’t the last episode slightly reworded – this is all completely new, good stuff. Well, I would say that wouldn’t I?

    1. Everything I covered in the last episode applies here.
    2. Focal lengths
    3. Crop factors
    4. Tripods
    5. Self-timer
    6. Rule of thirds and other rules
    7. Bad weather
    8. Sunrise and sunset
    9. Filters
    10. Landscape/ portrait
    11. Photograph what you like

    OK, let’s get into this.

    Everything I covered in the last episode applies here.

    • Photograph interesting stuff
    • Walk, look and think before you take a photo
    • Don’t just photograph the obvious
    • Find different viewpoints
    • Try to get one photo
    • Don’t be put off by rubbish weather
    • Work out where the best light is
    • Try a minimalist approach
    • Choose a rule (or rules) of composition and work with it (them).

    Ok – move on Rick

    Focal lengths

    Standard focal length – 50mm on a full frame camera, 75-80mm on a cropped sensor camera, 100mm on a micro four thirds camera.

    A standard lens is meant to replicate what and how we humans see the world. If we are being pedantic, it has been said that a 43mm focal length replicates the human view, but what is 7mm between friends? 50mm is the accepted standard focal length. And the point here is that with a wide-angle lens, you get a wider field of view and all that goes with that, and with a telephoto lens, you get a narrower field of view and all that goes with that.

    Here are some numbers.

    • Wide angle focal length – less than 50mm full frame, less than 75-80mm cropped sensor, less than 100mm micro four thirds
    • Telephoto focal length – more than 50mm full frame, more than 75-80mm cropped sensor, more than 100mm micro four thirds.

    I am talking effective focal length here, as in what you end up with. Why a lens on a micro four thirds camera doesn’t show the effective focal length is beyond me.

    I talked in general about how focal length changes the composition in episode 203, Understanding Focal Length and Its Effect on Composition.

    So, what landscape photography specific things are there?

    Don’t assume that landscape photos are always taken with wide-angle lenses. Of course, they are used for landscape photography, as they help us to capture, well, a landscape. However, within every landscape photo, there will be smaller parts of a composition that can make it completely different. And you can use a telephoto lens to narrow a sweeping vista to, oh, I don’t know, a single tree, for example.

    So, take that wide sweeping vista by all means, but once you have done that, look closer and see what you can find within that scene. I love doing this. There is often so much to discover.

    And here is something that you can do at home. Look at some of your landscape photos, zoom in on them, and see what you find within your compositions. This is a super effective thing to do, and it will hopefully get you looking at your landscape compositions differently when you are out taking photos.

    I am all about helping photographers take better photos, including taking photos in different ways and viewing things differently.

    So, don’t just use wide-angle lenses for your landscape photos, ok?

    Oh yes, I nearly forgot. You can also move closer to something to get a different perspective. Or further away. It is called zooming with your feet!

    Crop factors

    Full frame/ Cropped sensor/ micro four thirds cameras

    You need to bear in mind crop factors. I covered them in the previous point, but the point is this.

    You need to be aware that 33mm is a wide angle focal length on a full frame camera, but a standard focal length on a cropped sensor camera (ish) and telephoto focal length on a micro four thirds camera.

    It’s bonkers.

    But you need to be very aware if your camera has a crop factor, which potentially changes everything with every photo that you take.

    Tripods

    How can a tripod help you come up with better landscape photos? Simple. Using a tripod slows you down and makes taking a photo a much more considered, deliberate act.

    Put your camera on a tripod and you will take fewer photos. It is just one of those strange things.

    And putting your camera on a tripod also pushes you to take more time and care over your composition, as your camera is in a fixed position. You can make minor adjustments to a composition to really refine things and get the best single photo that you can.

    Taking photos with your camera on a tripod is different from taking photos handheld and can definitely help you take better photos.

    And there is the obvious benefit of getting supersharp photos and not needing to worry about low light, shutter speeds, high ISOs, noise etc etc.

    I take every photo that I can with my camera on a tripod. For these reasons.

    Self-timer

    With your camera on a tripod, use the self-timer to take a photo. I use the 10-second self-timer on my Canon 6D. This means that after gently touching the shutter release button, my camera has another 10 seconds to become still and stable to ensure I get the sharpest photo that I can.

    Sure, you can use a remote release to achieve the same, but I got rid of these in favour of the built-in self-timer. And no, this is not for selfies!

    Loupe viewers

    Your camera is on a tripod. It is a bright sunny day. You can barely see your LCD screen. Get a loupe viewer and the problem will be solved. I bought mine about 12 years ago for about £20 and it has served me splendidly ever since.

    The loupe viewer shades and magnifies the LCD screen, helping you compose and review photos in the field. And yes, you might well be in a field if you are doing landscape photography!

    Rule of thirds and other rules

    The rule of thirds is a landscape photographer’s friend. What is the rule of thirds? Imagine two horizontal lines, one one-third up from the bottom and one two-thirds up from the bottom. There are also two vertical lines, one-third in from the left, and the other two-thirds in from the left. With my Canon 6D, I can add the 3×3 grid to my LCD screen.

    How does this help us?

    Simple. Chances are that there is a horizon if you are taking a landscape photo. Put the horizon on one of these lines. Put the horizon on the upper line if there is more interesting stuff below the horizon, and put the horizon on the lower line if there is more interest above the horizon, such as in the sky.

    Putting the horizon in the middle does not give pleasing compositions and cuts the composition in half.

    This is a very simple but effective way to take better landscape photos. What is not to love?

    Bad weather

    Bad weather can make landscape photos. A clear blue sky can give you photos that are, well boring to be honest. Good job because we don’t see clear blue skies here in England often!

    Dull and grey weather is not great, but can be used creatively. Get lots of detail in a grey sky and you can sometimes get interesting black and white photos.

    Use bad weather in your photos, as bad weather can very quickly become dramatic.

    Sunrise and sunset

    Sunrise and sunset are, of course, great times to take landscape photos. Sunrise is my preference, as I love witnessing the start of a new day and watching that sun pop over the horizon.

    But there is the time before sunrise, when you can get all sorts of magical things happening with the light. And after the sun has risen, you have that wonderful directional light. To really appreciate this morning light, take a photo of something at sunrise, and then not long after the sun has risen, and again at noon, with the sun overhead in its highest position.

    Spot the difference? The photo taken at noon is probably nowhere near as good as the others.

    It is the quality and direction of the light that makes the difference.

    So be mindful of this when you are taking photos, whatever time of day it is. You might want to plan a day so that when the sun is more overhead, you photograph other things, such as indoor or street stuff.

    Filters

    Filters. How utterly old school. Filters attach to the front of a lens and do something to the light that passes through the lens to the camera sensor.

    There are lots of filters. I have two. Just two. A neutral density filter and a circular polarising filter.

    My neutral density filter, ND for short, is a whopping 10-stop filter. This means that I can use slower shutter speeds with the filter on than without it, as the neutral density filter reduces the amount of light getting through to the camera sensor.

    And 10 stops is a massive difference. Let me explain.

    I am taking a photo without the ND filter on.

    • The correct exposure at ISO100 is 1/125th second at f/8.

    With the ND filter on

    • The correct exposure at ISO100 is 8 seconds at f/8.

    8 seconds. That is absolutely bonkers. You can do long exposures in broad daylight.

    Do you know what, Neutral Density Filters Explained will be a future episode. I have added that to my list.

    The other filter I have is a circular Polarising filter – this can remove or reduce reflections and increase saturation in a photo. And being circular, you can rotate the filter to get the desired effect. And yes, polarising filters are going to be an episode all of their own too – how utterly splendid.

    I used to have loads of other filters, but I have these two now.

    Have I ever combined the two? No, I have never thought of doing that. Until now that is! And now of course I want to!

    Landscape/ portrait orientation

    Try both. Don’t just assume that a landscape photo should be taken in landscape orientation. And with the way that photos are viewed these days, such as on phones, portrait orientation should be more of a consideration than ever.

    And another thing that you can do yourself is change the orientation of photos you already have and see what happens – another excellent learning tip. Blimey, I am full of them today!

    And if you are using a tripod, and if not, why not dear listener, then get an L bracket and you can very quickly change from one to the other without losing the composition – the tripod head stays where it is. The camera is rotated through 90 degrees and fixed back to the tripod head.

    Photograph what you like

    If you like taking photos of beaches at sunrise, take photos of beaches at sunrise. If you like taking photos of empty baked bean cans, take photos of empty baked bean cans. Yes, that was the first example that came into my head after beaches. A worry I know. Or maybe it’s because I’m hungry?

    The point is this – photograph what you want to photograph. If you get to the point where you are being paid to take photos, you lose that choice to a degree, but that is OK if you are being paid right?

    And you might not know what you like to photograph, so if you don’t know, then best thing is to take photos of everything and anything and see what you liked and didn’t like.

    This takes thought, time and effort.

    But you will take better photos if you are taking photos of things you like, and you will enjoy taking photos more.

    Makes sense, right?

    OK – that is that – here are some things for you to do.

    Look at some of your photos and zoom in, see what you can find within a composition. And then do the same when you are out and about, taking photos.

    And with those same photos, try putting landscape orientation photos in portrait and vice versa and see what happens, see what you think.

    And when you have done some or all of this good stuff, let me know how you got on, dear listener.

    What if I use a phone to take photos?

    As in the last episode, all of the above. And I want to repeat the fill the frame bit. With a phone, the default lens is a wide-angle lens, meaning that you are starting off with stuff some way away. So, making the conscious decision to fill the frame will improve many photos taken with a phone.

    What do I do?

    I have already told you that. These 11 things are what I do. And I want to pick up on something from the last episode that applies to landscape photography.

    I went to my local woods once. Never been to them before. It was a cold, misty January morning. And do you know what? I got some of my favourite photos there. Yes, one cold, misty, mysterious January morning, not far from where I was living, I got some amazing photos that could have been taken anywhere, which is the point.

    I wasn’t expecting anything but got some really interesting stuff. And I had never been to this place before. It was the light and the mist and the trees that made this location special at that time.

    And the same photo can look completely different in the different seasons. Don’t treat a place where you got one great photo as a place never to come back to. Keep on going back to places at different times of the year, at different times and in different conditions to see if you can get a photo better than the one you already have.

    Which is what I do.

    And that is what I do.

    Some thoughts from the last episode

    Just to say that taking photos is not just raising your camera and pressing the shutter button. Taking the photo is probably the last 10% of the process for me.

    Next episode

    Something about photographing buildings: I’m not sure yet. Let’s see what appears in two weeks! This is what appeared – 21 Composition Tips For Better Photos Of Buildings – how utterly splendid!

    A quick plug for me and what I do.

    Well, why not? If I can’t plug myself on my podcast, where can I?

    You have found this podcast, so why not check out the podcast website photographyexplainedpodcast.com? I have another photography website, rickmcevoyphotography.com, where I write blog posts about my photographs of buildings and other good stuff. On my courses page, you will find my course, How to Become A Real Estate Photographer. You can also find me on YouTube talking about my podcast and my blog – type my name in, and you will soon find me.

    Get an email from me.

    If you want a weekly email from me, fill in the box on any of my websites, and every Friday, you will read what I am thinking about photography-related.

    That’s enough of the self-promotion.

    Ask me a question

    If you have a question you would like me to answer or you just want to say hi, email me at sales@rickmcevoyphotography.co.uk, visit the podcast website, or text me from the podcast feed.

    It is always lovely to hear from you, dear listeners.

    This episode was brought to you by a cheese and pickle sandwich and a bag of salt and vinegar crisps. Yes, I consumed it before settling in my homemade, acoustically cushioned recording emporium.

    I’ve been Rick McEvoy. Thanks again for listening to my small but perfectly formed podcast (it says here) and for giving me 27 minutes of your valuable time. I reckon this episode will be about 23 minutes long after I have edited out the mistakes and other bad stuff.

    Thanks for listening

    Take care and stay safe.

    Cheers from me, Rick

    That was the podcast episode

    Want to know more?

    Head over to the Start page on the Photography Explained Podcast website to find out more.

    And here is the list of episodes published to date – you can listen to any episode straight from this page which is nice.

    Let me know if there is a photography thing that you want me to explain and I will add it to my list. Just head over to the This is my list of things to explain page of this website to see what is on there already.

    Let me send you stuff

    I send out a weekly email to my subscribers. It is my take on one photography thing, plus what I have been writing and talking about. Just fill in the box and you can get my weekly photographic musings straight to your inbox. Which is nice.

    And finally a little bit about me

    Finally, yes this paragraph is all about me – check out my Rick McEvoy Photography website to find out more about me and my architectural, construction, real estate and travel photography work. I also write about general photography stuff, all in plain English without the irrelevant detail.

    Thank you

    Thanks for listening to my podcast (if you did) and reading this blog post (which I assume you have done as you are reading this).

    Cheers from me Rick

    Rick McEvoy Photography
  • 11 Travel Photography Composition Tips That Will Instantly Improve Your Shots

    11 Travel Photography Composition Tips That Will Instantly Improve Your Shots

    Do you want to take more interesting travel photos? Well, I do, and I hope that you do too. It is too easy to go somewhere and take average, boring photos of something you never do anything with. I have taken loads of these myself, so don’t worry. And it is so easy to take the same photo of something we have all seen a thousand times. Let’s not do any of that.

    No, there is so much more that we can do, and in this episode, I am going to tell you 11 things you can do to help you take better travel photos.

    And that was the answery bit.

    How utterly splendid.

    Hi, and a very warm welcome to Episode 204 of the Photography Explained podcast. I’m your host, Rick, and in each episode, I will try to explain one photographic thing to you in plain English in less than 27 minutes (ish) without the irrelevant details. Yes, really.

    I’m a professionally qualified photographer based in England with a lifetime of photographic experience, which I share with you in my splendid podcast.

    You can listen to this splendid episode right here

    Or keep on reading – entirely up to you.

    But wait, hang on Rick, are you saying I can’t take all those photos of famous landmarks and landscapes? Yes, I was, sort of, but let me explain.

    I said don’t just take the photos everyone else has already got, didn’t I? Don’t just. Why should we deprive ourselves of the headline shots just because everybody else got there first?

    So, it is fine to do that, but after we have done that, we can do so much more.

    Now, the title of this as a search query normally gives you a list of 11 rules of composition. But not my list. Oh no. Of course not. There is so much more to do than the taking photos bit.

    We all have some work to do before we take a photo. So, let’s get into these 11 things.

    1 Photograph interesting stuff.

    There is interesting stuff everywhere – you just need to find it. Travel photography does not have to be all about stunning beaches and blue skies, or world-famous landmarks. Where you are is a potential travel location for anyone who is not where you are after all. This depends, of course, on where you live and what is around you. I am very fortunate to live in Dorset in England, a lovely place with travel photo opportunities all around me.

    So go somewhere interesting to take interesting photos. Find somewhere interesting where you are, or somewhere near you.  There will be somewhere.

    Yes, this is the starting point. Find something interesting. This will significantly improve your chances of getting more interesting photos.

    And I repeat – this doesn’t just mean going to famous landmarks, far from it.

    Wherever we find ourselves in this big old globe of ours, there is always something interesting somewhere nearby – sometimes we have to look, think and do some work to find these places.

    If you think there is nowhere interesting near you, you are not thinking or trying enough. So, think about it, get out, and photograph those interesting places!

    2 Find out what a place is all about

    Travel photography is all about capturing a location, taking photos that show a place at its most interesting best. A successful travel photo makes someone want to know more or even want to be there.

    And what is interesting in a location will, of course, vary from place to place.

    And the only way to really get a feel for a place is to get out and explore.

    And we must keep telling ourselves, where you are might be a travel location for other people – travel photography is not constrained to places abroad from where you are.

    3 Walk, look and think before you take that photo

    I talk about this a lot. My photography superpowers are walking, thinking and looking. And of course, you too can do this; it costs you nothing other than your time and the wear of your shoes or other footwear of choice, whatever that might be.

    Rather than turning up somewhere, getting your camera out, and snapping away (that is a reference to someone who used to ask me to take some snaps of buildings who will remain nameless here), have a good old walk around and see what you can find. And when you think you have found something interesting to photograph, keep walking and looking and thinking, but at the thing that you have found, as when you move things in a composition, change.

    This is a narrowing-down process, which ends up with something interesting to photograph.

    4 Don’t just photograph the obvious

    I touched on this. If you are going to a landmark location, don’t just photograph the landmark stuff. Let me give you a very specific example. And it is a building in a nice place. Let me remind you. I photograph buildings and nice places, as well as buildings in nice places.

    The Leaning Tower of Pisa in Pisa, Italy. Of course, it’s in Pisa, the clue is in the name after all!

    I have been to the Leaning Tower of Pisa, real name, wait for it, Tower of Pisa. And boy does it lean. I was surprised by how much it leans.

    We’ve all seen the photos. So yes, take the photo that shows that remarkable lean, we shouldn’t deprive ourselves of such wonders just because they are popular. But once you have done this, then do something different. Do what no one else is doing.

    You can photograph this tower from an angle where it is not leaning. It is a beautiful structure after all. I wish I had done this.

    And you can also do this, which I did do.

    Rather than getting the headline shot and then moving straight on, look around and see what else is there. Which, in the case of the Tower of Pisa, is the utterly wonderful Battistero di San Giovanni. And there is also the spectacular Piazza del Duomo—apologies for the pronunciation.

    Check them out for yourself.

    I spent more time at the Battistero di San Giovanni than at the leaning tower. Now I am not being smug here, I am not looking down on all those people who took photos of the tower and all the various poses that people do with the tower in the background – no, that is all good stuff. This is people enjoying where they and taking photos. We should never look down on people taking these same photos; they are creating their own memories, which are special to them.

    But if you want your photos to stand out like I do and take the best photos that you can, if photography is your thing, in all these cases, there is so much more that we can do.

    Which is what I did. And there was just me at this architectural splendour. And thousands of people around the tower.

    Move on, Rick.

    5 Find different viewpoints

    I mentioned this in the last bit. Any scene can be viewed from more than one viewpoint; it is up to us to find them. And I have told you how to do this. By walking, looking and thinking.

    To do this, you need to give yourself time without pressure to get something—time to look around and see what you can find.

    And what do you do next when you have found that viewpoint and composition that looks interesting?

    6 Try to get one photo and one photo only (yes, really)

    Seamless transition, Rick, seamless.

    Yes, my one photo rule. Here is the 12-word version of it.

    “Take the time to take the best one photo of one thing”

    If you want to know more, check out episode 152, How My One Photo Rule Will Help You Take Better Photos, for much more. And episode 197, How To Take Fewer Photos But Better Photos In 2025 (With My One Photo Rule)

    I use this rule to remind myself what I am all about, and that I don’t want to get home to sort through 200 photos of one thing. Sorting photos is boring, and I do not like doing it.

    So, if I get home with one photo that is a contender for my portfolio, I am a very happy chappy.

    Trying to get a better photo than one that you already have is a super effective way of approaching taking photos, it gives you a purpose and takes away a load of variables.

    7 Don’t be put off by rubbish weather

    Rubbish weather can give you great photos.

    I live in England. If I had to wait for lovely clear blue skies and wall-to-wall sunshine, I would take photos on about 1 day in every 20. We English people talk about the weather a lot. We complain about the weather a lot. It is something of an English tradition to talk about the weather. At the start of every weekly email I send on a Friday, I normally start with a comment about the weather. And if you want to hear my thoughts on the weather every Friday more on this later! (Don’t let this put you off).

    My take is this – blue skies can get boring. I would imagine. I love clouds. I am a big cloud fan. And I love dramatic weather. Any bad weather has the chance to go dramatic, especially in our more unpredictable than ever climate. Not a good thing I have to say.

    So, if the weather forecast is terrible, I do not let it put me off getting my camera out and going off somewhere. And neither should you.

    But if you live somewhere where the weather is always lovely, please let me know if this is boring or not.

    8 Work out where and when the best light is

    Photography is drawing with light. So, it makes sense to find out when and where the light is at its best. It is the free but most important ingredient of every photo we take.

    The position of the sun varies during the day, of course. Well, it is easy to forget that here as we go through weeks of cloud and general dullness. But let’s not just restrict ourselves to golden hour, sunrise or sunset and the time before and after. No, for every photo, there will be an optimal position for the sun, so we need to work this out. And some apps can help us with this.

    When looking at the light, we need to see what it is doing to a composition and work out when the light is best for that photo, whenever that might be. And we can only work this out by walking around, looking, thinking, and returning to places at different times and seasons. If you can.

    OK – I have covered eight things and only now do I get on to the taking photos bit. Yes really. I told you my list differed from many others, didn’t I? These three things are three approaches that you might like to take.

    9 Try a minimalist approach

    Yes really. It is always tempting when you are in a super interesting place to capture everything in one composition. Sure, you can do this to capture a place’s scale and overall feel, but more often than not, the interesting stuff is in there somewhere. Single things make simple but interesting compositions. This is why the looking and thinking bit is so important.

    My one photo rule doesn’t mean taking one photo of a location and then moving on to another. Far from it. What I mean is, take one photo of one thing, don’t take 20 photos of the same thing from similar angles.

    10 Choose a rule (or rules) of composition and work with it (them)

    I listed all the rules of composition in episode 202, What Are The Rules Of Composition? (And Which Do I Use?). Choose one, two, three, whatever, and use them. Remember, the rules of composition are not rules; they are well-established guidelines that help us to get better compositions.

    Use the same rules consistently and your photos will develop their own look, their own style, their own feel. And knowing that you are using say two rules of composition really helps you to take photos because when you are composing a photo, you have these guidelines to help you make that composition.

    This really works, and I do this all the time to help.

    Check out episode 202 for all the rules and find the ones that work for you. And the rules that you use will vary depending on what the subject matter is. Take a photo of a beach, and you will use some rules that you would not use for a photo of a bohemian market at night. Unless you want to. But work out which rules can help you for the variety of things you are taking photos of.

    I use the rule of thirds as a starting point for my photos. I use the rule to help me to place things in a photo.

    I talked about the rules of composition. But there is one more specific thing I want to mention.

    11 Fill the frame

    I see so many travel photos where there is something lost in the middle of the photo. What was meant to be the point of interest is so small that it is not contributing to a photo. You can barely see it. If it is not clear what the subject of a photo is, we have a problem. We need to be clear about what we are photographing and what we are trying to say and show people.

    And one way of doing this is to fill the frame with the subject matter.

    Do all these things and let me know how you get on, dear listener,

    12 Edit, use and share the interesting photo

    And not the one that everyone else took.

    Yes, I am back to that headline landmark photo that we have seen a thousand times. Don’t share that photo. Don’t use that photo as part of your body of work. Use your alternative photo – that will make your photo stand out for sure.

    So, dare to be different.

    And that is where I want to stop. I have given you things to think about, things that you can do.

    Yes, that was 12 things. I didn’t want to change the title from 11 to be honest, so let’s treat 12 as a bonus.

    OK – that is that – here are some things for you to do.

    Choose some rules and use them. Start with 1 or 2 and get used to taking photos using these rules. And see if this changes your photos, and how you approach taking photos.

    And try to fill the frame.

    Have a go and let me know how you get on.

    What if I use a phone to take photos?

    You can do all this good stuff with a phone the same way you can with a camera.

    And I want to repeat the fill the frame bit. With a phone, the default lens is a wide-angle lens, meaning that you are starting off with stuff some way away. So, making the conscious decision to fill the frame will improve many photos taken with a phone.

    What do I do?

    I have already told you that. These 11 things are what I do. And many times, I need to do them better. And writing this and spring being here, I need to get out and do much more of what I talk about!

    One thing I want to say here is going back to the Leaning Tower of Pisa. I took one photo of the leaning view. Well, why not? I haven’t even edited it. I have never done anything with it. But the photo of the wonderful Battistero San Giovanni has had multiple edits and been used for loads of different articles that I have written.

    And when I was taking the photos of the Battistero San Giovanni, there was no one else there. Ok, there was one person sitting in the shade of a doorway, but no one else. I had this amazing place all to myself. No people in the way of my photos. And the main event, the leaning tower, which is a 2-minute walk away, was absolutely rammed.

    Again, not snobbery, I love people taking photos, but I like to be a little bit different where I can.

    Another thing that I do is this: I do not research a place before I go there. I do not check out photos of a place I am going to.

    Why not? I want to find my own things to photograph; I am not going there to photograph what everybody has already photographed. This builds on what I said earlier. I’m not saying you have to do this, just that this is what I do.

    And that is what I do.

    Some thoughts from the last episode

    How did you get on with working out what 20mm, 50mm, and 200mm look like with your eyes?

    Next episode

    Landscape photography – same question, different subject. Yes, I am going to give you some practical examples of getting the best compositions when we take landscape photos. Nice.

    11 Landscape Photography Composition Tips That Will Instantly Improve Your Shots

    A quick plug for me and what I do.

    Well, why not? If I can’t plug myself on my podcast, where can I?

    You have found this podcast, so why not check out the podcast website photographyexplainedpodcast.com? I have another photography website, rickmcevoyphotography.com, where I write blog posts about my photographs of buildings and other good stuff. On my courses page, you will find my course, How to Become A Real Estate Photographer. You can also find me on YouTube talking about my podcast and my blog – type my name in, and you will soon find me.

    Get an email from me.

    If you want a weekly email from me, fill in the box on any of my websites, and every Friday, you will read what I am thinking about photography-related.

    That’s enough of the self-promotion.

    Ask me a question

    If you have a question you would like me to answer or you just want to say hi, email me at sales@rickmcevoyphotography.co.uk, visit the podcast website, or text me from the podcast feed.

    It is always lovely to hear from you, dear listeners.

    This episode was brought to you by a cheese and pickle sandwich and a bag of salt and vinegar crisps. Yes, I consumed it before settling in my homemade, acoustically cushioned recording emporium.

    I’ve been Rick McEvoy. Thanks again for listening to my small but perfectly formed podcast (it says here) and for giving me 27 minutes of your valuable time. I reckon this episode will be about 23 minutes long after I have edited out the mistakes and other bad stuff.

    Thanks for listening

    Take care and stay safe.

    Cheers from me, Rick

    That was the podcast episode

    Want to know more?

    Head over to the Start page on the Photography Explained Podcast website to find out more.

    And here is the list of episodes published to date – you can listen to any episode straight from this page which is nice.

    Let me know if there is a photography thing that you want me to explain and I will add it to my list. Just head over to the This is my list of things to explain page of this website to see what is on there already.

    Let me send you stuff

    I send out a weekly email to my subscribers. It is my take on one photography thing, plus what I have been writing and talking about. Just fill in the box and you can get my weekly photographic musings straight to your inbox. Which is nice.

    And finally a little bit about me

    Finally, yes this paragraph is all about me – check out my Rick McEvoy Photography website to find out more about me and my architectural, construction, real estate and travel photography work. I also write about general photography stuff, all in plain English without the irrelevant detail.

    Thank you

    Thanks for listening to my podcast (if you did) and reading this blog post (which I assume you have done as you are reading this).

    Cheers from me Rick
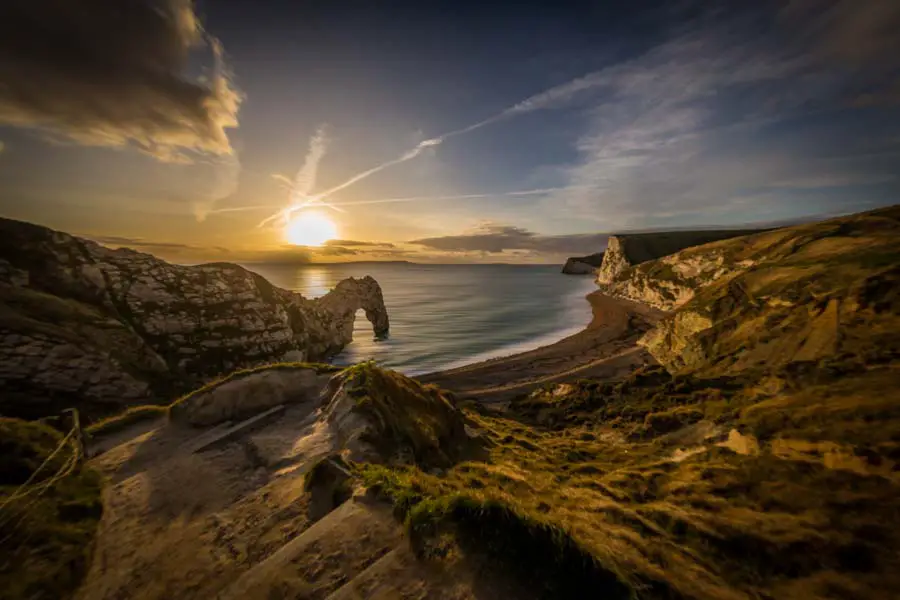
    Rick McEvoy Photography
  • Understanding Focal Length and Its Effect On Composition           

    Understanding Focal Length and Its Effect On Composition           

    The focal length you use to take a photo will significantly affect the photo you create. It will determine what is in a photo, what is not in a photo, how small or large the elements of the photo are, and how the elements in your photo relate to each other. The focal length you use will also determine the depth of field, or as I like to call it, depth of sharpness, that there is in a photo.

    The focal length you use will significantly impact the photo you get. Let’s find out all about this.

    And that was the answery bit.

    How utterly splendid.

    You can listen to the episode right here on the podcast feed.

    Or keep on reading – entirely up to you.

    Hi, and a very warm welcome to Episode 203 of the Photography Explained podcast. I’m your host, Rick. In each episode, I will try to explain one photographic thing to you in plain English in less than 27 minutes (ish) without the irrelevant details. Yes, really.

    I’m a professionally qualified photographer based in England with a lifetime of photographic experience, which I share with you in my splendid podcast.

    And no rules this week, which has to be a good thing.

    What is the focal length in photography?

    Let’s start by looking at focal length and its meaning.

    The focal length of a lens is the physical dimension between the lens and the camera sensor. Which bit of the lens are we measuring? It is the bit within the lens where the light rays are travelling without changing direction. I will stop there as to say any more would take me into the realms of irrelevant detail—knowing any more would not help me.

    There is a significant thing here, though – in general terms, the larger the focal length value, the larger the lens. That makes perfect sense, doesn’t it?

    I need to go through some stuff quickly here. I want to talk more about composition than the technical stuff, so I am going to go through the technical stuff very quickly. Check out episode 189—Camera Lenses Explained—My Beginner’s Guide for more.

    Focal lengths explained quickly.

    OK—to explain focal lengths so we normal people can understand, let’s start with a standard lens. A standard lens has a focal length of 50mm on a full-frame camera.

    Yes, sorry, but we get into a complications straight away. A full frame camera has a sensor that is 36mm wide by 24mm high.

    There are cropped sensor cameras and micro four-thirds cameras, which have crop factors, which makes this even more complicated. I will return to crop factors, but let me first go through this for full-frame cameras.

    A 50mm focal length on a full-frame camera gives a horizontal field of view, of about 40 degrees. That is similar to how humans see the world. I prefer the angle of view to the field of view. Do we have to be in a field? But that is not important here. Sorry. Move on, Rick.

    A wide-angle lens has a focal length smaller than 50. The smaller the number, the smaller the focal length, the wider the field of view, the larger the depth of field, and the further away and smaller things in a photo look.

    A telephoto lens has a focal length larger than 50. The larger the number, the larger the focal length, the narrower the field of view, the shallower the depth of field, and the larger things look in a photo.

    Crop factors explained quickly.

    A micro four-thirds camera has a crop factor of 2x. A cropped sensor camera has a crop factor of 1.5 – 1.6x, depending on the actual sensor size. Yes, these vary with different manufacturers and, indeed, different camera models.

    The reason is that cropped sensor cameras have sensors smaller than those in full-frame cameras, and micro-four-thirds cameras have sensors smaller than those in cropped sensor cameras.

    But what does this mean?

    A 50mm focal length on a cropped sensor camera gives an effective focal length of 50 x 1.5 or 1.6 ish, which is 75-80mm.

    A 50mm focal length on a micro four-thirds camera gives an effective focal length of 50 x 2, which is 100mm.

    I know it’s more complicated than we would like.

    And that is the nuts and bolts of how focal length affects the composition.

    As I said earlier, I am not going into the technical side here. I want to stick to the compositional side.

    Composition and focal length

    Composition is what you include in a photo and how the things in your composition relate to each other. Your focal length will determine what you include and do not include in a photo.

    The horizontal angle of view is about 84 degrees with a 20 mm focal length and about 10 degrees with a 200 mm focal length.

    I hope you can picture these.

    I think we can quickly relate what we see, about 40 degrees, to an angle of view of 84 degrees. It is a massive difference.

    • A 20mm focal length gives us an angle of view that is more than double what we see.
    • A 200mm focal length gives us the middle quarter of what we see.
    • A 50mm focal length replicates what we see and how we see things relative to each other.
    • The wider the focal length, the further apart things appear in a photo.
    • The longer the focal length, the closer things appear to each other in a photo.

    Again, the focal length is relative to what we see at 50mm.

    One problem with wide-angle lenses is that the subject matter can get lost in a photo if you are not close enough to it. But if you are shooting a wide vista, that is fine.

    But with a telephoto lens, you can fill the frame with the subject matter and exclude everything else, which can be a good or bad thing.

    So, if you want photos that look natural and familiar, a 50mm focal length seems like a good idea, right? There are many views on this, but ultimately, this is up to you, dear listener.

    And this is the point—there are so many variables, but the best focal length depends on what you photograph and how you want to convey it. Yes, this is down to you, dear listener, and this is the beauty of photography. As the photographer, you take all these variables and use them to take the best photos you can.

    The other factor – where you are

    Where you place yourself will have a huge impact on a photo. Rather than zooming in, you can always get closer to the subject matter or go further away. Where you are relative to what you are photographing affects the composition and influences how the focal length works with the composition.

    Depth of field or depth of sharpness? I can’t help myself.

    Aperture and focal length both influence the depth of sharpness in a photo.

    • Small aperture – large number – more depth of field.
    • Large aperture – small number, less depth of field.
    • Long focal length – less depth of field.
    • Wide focal length – more depth of field.

    Perspective

    • Long focal length – things appear closer together.
    • Wide focal length – things appear further apart.

    The focal length will determine the perspective and how close things are to each other.

    But if you take a photo of something very close up using a wide-angle focal length, this will change how everything looks.

    And with a long telephoto lens, things can look compressed, closer together.

    A quick word on sharpness.

    The longer the focal length, the more magnified the image is, so the less forgiving the camera is to blur in photos caused by camera shake. No, the camera is not shaking, but that is the term we have ended up with for any movement when taking a photo that causes a blurry photo. Camera shake, Don’t start me on that one.

    This is why if you are shooting handheld, your shutter speed should be faster than the reciprocal of the focal length. In English, this means that if you are taking a photo handheld with a 200mm focal length, your shutter speed should be faster than 1/200th second—unless you have image stabilisation.

    And this little lot might explain why there are so many lenses and so many different focal lengths.

    OK that is that – that is all I want to say here.

    What focal length should I use?

    Do you know what? I am going to apply this little lot to my photography, including photos of buildings, landscapes, and travel photography. I think that an episode on each of these will finish this series of episodes on composition nicely.

    How utterly splendid.

    Right – here are some things that you can do

    Work out what 20mm, 50mm and 200mm look like with your eyes.

    Take a photo of something using the widest, standard, and longest focal lengths you have and compare the differences.

    And if you are feeling adventurous, do the same with the maximum and minimum apertures.

    And have a look at what you get.

    Learning from your own photos taken with your own gear is much more effective.

    Once you have done these things, let me know how you got on.

    What if I use a phone to take photos?

    Well, focal length is a bit of an issue. You just need to forget that it is not physical, but the effect is the same. On my iPhone 15 Pro, the 1x setting is the default. When I touch the 1x bit, the focal length of 24mm appears. 2x is 48mm. 3x is 77mm. I know, 24 x 3 does not equal 77.

    Using one of my apps, the 1x lens gives a field of view of 71 degrees, while 24mm on a full-frame camera gives a field of view of 73 degrees.

    Similar but not the same.

    I quite like the iPhone 1x, 2x, etc. It removes the numbers and leaves us with what we can see, which I like.

    So, using a phone, you have focal length just like you do with a camera, if the numbers are a bit different. But with similar results.

    What do I do?

    I have a Canon 17-40mm lens. The 17mm bit gives me a whopping 93-degree field of view.

    I have an Olympus 12-40mm lens, but the 12mm gives me a paltry 71 degrees because of the crop factor. I need an 8.5 mm focal length lens on my micro four-thirds camera to get the same field of view as my Canon. Yes, 2 x 8.5 = 17. See, crop factor isn’t that bad.

    And I use 17mm for most of the photos that I take.

    That is what I do.

    Some thoughts from the last episode

    Did you check out the rule of thirds? How did you get on with it? Let me know; it would be lovely to hear from you.

    Next episode

    11 Travel Photography Composition Tips That Will Instantly Improve Your Shots. Yes really. It’s time to put all this composition stuff to practical use. Excited to do this.

    A quick plug for me and what I do.

    Well, why not? If I can’t plug myself on my podcast, where can I?

    You have found this podcast, so why not check out the podcast website photographyexplainedpodcast.com? I have another photography website, rickmcevoyphotography.com, where I write blog posts about my photographs of buildings and other good stuff. On my courses page, you will find my course, How To Become A Real Estate Photographer. You can also find me on YouTube talking about my podcast and my blog – type my name in, and you will soon find me.

    Get an email from me.

    If you want a weekly email from me, fill in the box on any of my websites, and every Friday, you will read what I am thinking about photography-related.

    That’s enough of the self-promotion.

    Ask me a question

    If you have a question you would like me to answer or you just want to say hi, email me at sales@rickmcevoyphotography.co.uk, visit the podcast website, or text me from the podcast feed.

    It is always lovely to hear from you, dear listeners.

    This episode was brought to you by a cheese and pickle sandwich and a bag of salt and vinegar crisps. Yes, I consumed it before settling in my homemade, acoustically cushioned recording emporium.

    I’ve been Rick McEvoy. Thanks again for listening to my small but perfectly formed podcast (it says here) and for giving me 27 minutes of your valuable time. I reckon this episode will be about 15 minutes long after I have edited out the mistakes and other bad stuff.

    Thanks for listening

    Take care and stay safe.

    Cheers from me, Rick

    That was the podcast episode

    Want to know more?

    Head over to the Start page on the Photography Explained Podcast website to find out more.

    And here is the list of episodes published to date – you can listen to any episode straight from this page which is nice.

    Let me know if there is a photography thing that you want me to explain and I will add it to my list. Just head over to the This is my list of things to explain page of this website to see what is on there already.

    Let me send you stuff

    I send out a weekly email to my subscribers. It is my take on one photography thing, plus what I have been writing and talking about. Just fill in the box and you can get my weekly photographic musings straight to your inbox. Which is nice.

    And finally a little bit about me

    Finally, yes this paragraph is all about me – check out my Rick McEvoy Photography website to find out more about me and my architectural, construction, real estate and travel photography work. I also write about general photography stuff, all in plain English without the irrelevant detail.

    Thank you

    Thanks for listening to my podcast (if you did) and reading this blog post (which I assume you have done as you are reading this).

    Cheers from me Rick
    Rick McEvoy Photography
  • What Are The Rules Of Composition? (And Which Do I Use?)

    What Are The Rules Of Composition? (And Which Do I Use?)

    The rules of composition are not rules. The rules of composition are guidelines, ideas, things that we can use to help us. But you need to know what the rules of composition are so you know which rules you are going to use, if any. You don’t have to use the rules of composition, and you will never use all of them. Certainly not in the same photo, but you will see why, so don’t worry. Find the ones that work for you, and they can help you get better compositions. And better compositions make better photos.

    In this episode, I will tell you more about the rules of composition, list all the ones I can think of, and then tell you which ones I use, and why.

    How utterly splendid.

    You can listen to the episode here

    Or keep on reading – entirely up to you.

    Hi, and a very warm welcome to Episode 202 of the Photography Explained podcast. I’m your host, Rick, and in each episode, I will try to explain one photographic thing to you in plain English in less than 27 minutes (ish) without the irrelevant details. Yes really.

    I’m a professionally qualified photographer based in England with a lifetime of photographic experience, which I share with you in my splendid podcast.

    First – a quick recap

    What is composition?

    Composition is what you include in a photo. And what you do not include in a photo. The subject matter, the other things in the composition, and how they relate to each other.

    And, of course, what the light is doing.

    What are the fundamentals of composition (in my opinion)?

    • Subject matter.
    • Other elements in the composition.
    • Light.

    That is composition to me.

    OK – let’s look at these rules.

    Are these rules of composition actual rules?

    No they are not. These are not rules to be followed; these are ideas, thoughts, guidelines, principles. Call them what you want, but they are not rules.

    I hate the term and am the kind of person who, if I am told there are rules, will start from the viewpoint – no one’s telling me what to do!!

    No, these are simply things that we can use if we want to help us with our compositions. That is all.

    What are the rules of composition?

    This is the list of rules of composition that I could find, and I put them in alphabetical order. 

    Here’s the list.

    1. Add human interest
    2. Background context
    3. Balance
    4. Black and white
    5. Break the pattern
    6. Centred composition
    7. Colour theory
    8. Colour combinations
    9. Complementary elements
    10. Contrasting colours
    11. Cropping
    12. Depth of field
    13. Diagonals and triangles
    14. Don’t cut off limbs (but the top of the head is fine!)
    15. Fill the frame
    16. Foreground interest and depth or as I’ve written it, foreground internet and depth.
    17. Framing
    18. Golden Ratio
    19. Golden Spiral
    20. Golden Triangle
    21. High or low
    22. Juxtaposition
    23. Leading lines
    24. Left to right
    25. Let the eye wander
    26. Minimalism
    27. Negative space
    28. Patterns
    29. Reduce clutter
    30. Reflections
    31. Repeat elements
    32. Rule of odds (never heard of that one)
    33. Rule of space
    34. Rule of thirds
    35. Scale and hierarchy
    36. Shoot from below
    37. Shoot from above
    38. Simplicity
    39. Space to move
    40. Symmetry
    41. Textures
    42. The decisive moment
    43. Viewpoint

    Yes, there are 43 of them. I have come up with this little lot by ploughing through a load of articles on the rules of composition.

    This is problem 1 – if there are 43 rules, or things, what possible chance do we stand of using them?

    You could add these to a list and have them on your phone for reference. But do we want to go through 43 things before we take a photo? Of course we don’t.

    I am not going to explain what they all are, you know what they are now, so now you can find out what they mean and if they could help you. And if you have any specific questions, just get in touch with me and I will help you.

    What rules of composition do I use?

    Rule of thirds

    This is my go-to rule. Sorry, I hate the term rule; it is so misleading, but I will stick with it.

    I use the rule of thirds a lot. Well all the time.

    And I have to start by explaining in words what is a very visual thing.

    Look at any photo, or look through your viewfinder.

    Imagine two horizontal lines, the lower one one third up from the bottom, the upper one two-thirds up from the bottom.

    Next, imagine two vertical lines, the first one-third from the left-hand edge and the second two-thirds from the left-hand edge.

    Ok – you have four lines dividing the frame into nine areas, with four intersecting points.

    That is the grid for the rule of thirds. That is it. It is that simple.

    And if you check out the episode page on the Photography Explained Podcast website, you will find a photo that I have marked up to show what I am talking about.

    Here are lots of examples

    These four lines and four intersecting points are what I use to create compositions.

    If you use this rule and only this rule, you will hopefully see improvements in your compositions.

    And this is not an exact science, you don’t have to be bang on, and you probably won’t be, so don’t worry about being precise. But use these lines and points to help place things. Use the principles of where these things are.

    These four lines and intersecting points are very powerful.

    How do I use the rule of thirds?

    I use the intersecting points if I’ve got something I want to emphasise, because those four intersecting points are points the eyes are initially drawn to.

    I use the horizontal lines on a landscape photo to place the horizon on either the lower or upper lines.

    This will vary with what I am photographing and what is more interesting in the photo, the foreground or the background. I also want to include what I want to include in a photo.

    If there’s loads of interest in the sky I will include more of it. If there’s more interest in the foreground, or that’s what I’m photographing, I will use the lower line.

    And what this does immediately is this.

    Do this and you’re not putting the horizon in the middle of your frame, which is basically cutting your photo in half, which is aesthetically very unpleasing.

    And bad composition.

    With my photos of buildings, architectural photography, construction photography, and real estate photography, I use the rule of thirds in a couple of ways.

    Firstly, I use horizontal and vertical lines to help me get the building level and vertical as I set my camera and composition.

    I start with the top and bottom of the building on the two horizontal lines, with the corners of the building near the intersecting points.

    I say near to the intersecting points as every building is different, and there are different things in front of and behind buildings that I need to capture.

    But that is my starting point. And if I need to zoom in a bit, pushing the intersecting points out, I know by how much and can do the same on the other photos, making the photos a cohesive set.

    And it is that simple.

    These four lines and intersecting points are the starting point for pretty much every photo I take.

    And here is the good news – you can add these to your camera.

    You can add the 3×3 grid view to your LCD screen with Canon cameras. Yes, the rule of thirds is so significant that Canon have included it as an option on the LCD screen. That tells us a lot doesn’t it?

    I hope that your camera has this feature.

    Let’s think about this briefly. This very simple but effective rule of composition, the rule of thirds, is built into cameras. You can have the rule of thirds on your LCD screen every time you take a photo.

    How utterly splendid.

    Is this not boring?

    Some might think so, and if you don’t like the sound of these restrictions, I get it, but remember this.

    If you are serious about your photography, you should be looking for a degree of consistency with your photos. Your end point is that someone looks at a photo you have taken and knows you took it, because your look and style are so distinctive.

    I have not got to that point. Far from it. But my photos have a look and feel, look at the photos on my website (rickmcevoyphotography.com) and you will see what I am talking about.

    These four lines and four points work, and give compositions that are pleasing to the eye. The intersecting points give natural, visually pleasing locations for points of interest in a photo.

    And they help me to get compositions technically correct in camera.

    Get it right in camera

    If something helps me get a composition correct in camera, I am all for it. Photographing buildings is a technical exercise, and those guidelines on the LCD screen help me get things right. I refine this with the horizontal level, but the grid helps me get the composition.

    Get as much as you can right in camera rather than relying on “fixing it in Photoshop” – which is to be avoided.

    I am going to stop banging on about the rule of thirds and move on.

    What other rules or guidelines do I use. See, I hate the term so much?

    I was going to talk about these but will mention them here – I don’t have time to go through them all.

    • Depth of field
    • Diagonals and triangles
    • Foreground interest and depth
    • High or low, different viewpoints
    • Leading lines
    • Reducing clutter
    • Scale and hierarchy
    • Simplicity and minimalism

    And let’s not forget, of course, my one-photo rule. Try to get the best one photo that you can. And the rule of thirds can help you with this.

    Right – here are some things that you can do

    I introduced this last episode, and I love it!

    Check out the rule of thirds, see if you can add a 3×3 grid to your camera screen. And even better if you can add it to your viewfinder.

    And try to use the four lines and four intersecting points. And then let me know how you get on.

    What if I use a phone to take photos?

    I have an iPhone. The rule of thirds grid is right there in the default camera app. So Canon and Apple both agree that this is useful, this rule of thirds. So if you did not know what those lines were, now you do and you can use them!

    What do I do?

    I use the rule of thirds as a starting point for pretty much every photo I take. I use the principle of the rule of thirds to help me get the best compositions I can. I might vary slightly from the preciseness of the four lines and points, but these will be the starting point for every photo.

    I use these lines and points to place a building in a composition.

    And for my landscape photos, I use these lines and points to place the horizon and points of interest in a photo.

    And I use the rule of thirds for thumbnails for videos on my YouTube channel!

    This rule is everywhere, and I love it.

    That is what I do.

    Some thoughts from the last episode

    At risk of repeating myself, composition is the most important thing in photography—end of. Your composition is what you include in a photo. And all someone else sees and indeed cares about, who is looking at your photo.

    And at the moment that you are taking a photo, no one else is taking the same photo in the same way with the same settings as you. The photo you are taking is unique.

    Next episode

    Understanding Focal Length and Its Effect On Composition. Nice and specific.

    A quick plug for me and what I do.

    Well, why not? If I can’t plug myself on my podcast, where can I?

    You have found this podcast, so why not check out the podcast website photographyexplainedpodcast.com? I have another photography website, rickmcevoyphotography.com, where I write blog posts about my photographs of buildings and other good stuff. On my courses page, you will find my course, How To Become A Real Estate Photographer. You can also find me on YouTube talking about my podcast and my blog – type my name in, and you will soon find me.

    Get an email from me.

    If you want a weekly email from me, fill in the box on any of my websites, and every Friday, you will read what I am thinking about photography-related.

    That’s enough of the self-promotion.

    Ask me a question

    If you have a question you would like me to answer or you just want to say hi, email me at sales@rickmcevoyphotography.co.uk, visit the podcast website, or text me from the podcast feed.

    It is always lovely to hear from you, dear listeners.

    This episode was brought to you by a cheese and pickle sandwich and a bag of salt and vinegar crisps. Yes, I consumed it before settling in my homemade, acoustically cushioned recording emporium.

    I’ve been Rick McEvoy. Thanks again for listening to my small but perfectly formed podcast (it says here) and for giving me 27 minutes of your valuable time. I reckon this episode will be about 15 minutes long after I have edited out the mistakes and other bad stuff.

    Thanks for listening

    Take care and stay safe.

    Cheers from me, Rick

    That was the podcast episode.

    Want to know more?

    Head over to the Start page on the Photography Explained Podcast website to find out more.

    And here is the list of episodes published to date – you can listen to any episode straight from this page which is nice.

    Let me know if there is a photography thing that you want me to explain and I will add it to my list. Just head over to the This is my list of things to explain page of this website to see what is on there already.

    Let me send you stuff

    I send out a weekly email to my subscribers. It is my take on one photography thing, plus what I have been writing and talking about. Just fill in the box and you can get my weekly photographic musings straight to your inbox. Which is nice.

    And finally a little bit about me

    Finally, yes this paragraph is all about me – check out my Rick McEvoy Photography website to find out more about me and my architectural, construction, real estate and travel photography work. I also write about general photography stuff, all in plain English without the irrelevant detail.

    Thank you

    Thanks for listening to my podcast (if you did) and reading this blog post (which I assume you have done as you are reading this).

    Cheers from me Rick
    Rick McEvoy Photography